Some general thoughts to do with furnace building
.
This page might ramble on a bit, and I will probably add to it as time goes on, so I will use an index to give an idea as to what's where!
.
1/ Heating a furnace
2/ Refractorys
.
Heating a furnace
This simple description will be useful for reference (I hope!)
.
We have half a pint of water in a pan that we want to boil. We also have a big box of candles, light a candle under the pan and what happens? Not a lot! Although the candle flame is burning at a much higher temp. than the 100 deg.c. needed to boil the water. The heat losses are too great to bring the temp. of the water up very much, we can put candle after candle under the pan, but the water will never boil.
.
The heat from the candle is dissipating too quickly in a number of places, firstly to the pan then to the water. Both of them are then loosing heat to the atmosphere.
Now bundle 20 candles together light them all under the pan and the water will boil. Each candle flame is still producing the same temp. as the single one, but together they supply enough heat energy to overcome the losses. If you only used 10 candles, you would build up some heat, but not enough.
.
Although it may seem obvious, that's all we're trying to achieve. We need to generate enough heat to overcome the losses and melt the metal!
Lets start with solid fuel, if you light wood or charcoal in your furnace, it ignites as a mass quite quickly once the air blast is put on. However they will both burn away quite quickly as well!
Any form of coal on the other hand, will take quite a long time for the whole mass to ignite. Therefore if the air blast is put on too early, all you'll do is burn away the coals at the bottom which are alight while the coals higher up are still getting hot enough to ignite!
.
Think of any solid fuel as a gas cylinder and heat applied to it opens up the valve, the more heat, the more gas is let out. The valve only opens when the coal is very hot, so if only 20% of the coals are red, you have only 20% of the possible heat energy. By the time the rest of the coals are glowing, a lot of the lower fuel is burnt away, so you might never have more than 50% of your possible heat energy available at any time, think of the candle example above.
.
By lighting the coal, topping up the furnace and only having a gentle air blast until ALL the coals are glowing, when the blast is turned on full, you will have 100% of your heat energy working on melting the metal. If you ever want to melt cast iron on solid fuel, this is the way to do it.
.
The fuel will burn down very quickly and will need topping up, especially when melting cast iron. If you wait until the fuel is 3/4 burnt away, you will then have the same problem as starting the blast too early! You will have most of your fuel NOT producing any gas while the rest is burning away producing only a fraction of the needed heat!
.
If the crucible is lifted up to allow the hot fuel under it, and new fuel is added before too much of the original fuel is burnt away, you should be able to maintain around 80%-90% of the possible heat until the job is done.
.
This is the same for burning gas or oil, any fuel for the matter! You must be burning enough fuel to do the job, regardless of the heat the fuel is capable of producing (look at the candles)!
.
If the metal is placed directly in the furnace with the fuel, like a cupola furnace. There is a direct physical contact between the burning fuel and the metal causing a very rapid heat transfer between them.
Since there are also no barriers between the radiated heat from the fuel and the metal where it doesn't touch, the whole melting process is very fast,
which is one of the reasons I've built my furnace with its direct melting ability.
.
Using a crucible changes this, there is now a physical barrier between the heat source and the metal. The thicker the crucible is, the more heat energy is absorbed before it has a chance to work on the metal, and then it's only indirect radiated heat until some of the metal melts to give direct contact with the crucible.
Given a long enough period of time, the inside of the crucible will become the same temperature as the inside of the furnace. But if the furnace, once it's heat losses are taken into account, is only running at slightly above the temp. needed to melt the metal, this will take forever!
.
So now the furnace must be run at a much higher temp. than theory suggests to melt the metal efficiently. Even if you are only melting aluminium in a metal pot, you will notice a big difference if you use a thicker metal pot, let alone a ceramic crucible.
Clay is quite a good insulating material and a clay/graphite crucible will insulate our metal very well, which is a real pain considering we're trying to get it a hot as possible! This means, unless you are prepared to wait forever for the metal to melt, the temp. inside the furnace must be considerably higher than the end temp. we need the metal at.
.
This now leads to the next point, how hot do we need the metal to be? Let me point out, I have no means to check the temps. either of the furnace or the metal, I simply know that if something melts, I've exceeded the melting temp. of that material.
Since I often melt the 1700deg.C. lining in my furnace, I have to assume I am exceeding that temp.
.
Aluminium will melt at around the higher end of the 600 degC. bracket, but if you try to pour it at that temp. you'll fail! A good pouring temp. for aluminium is around 740 degC. but if your casting has very thin sections you will probably need to be much higher than this.
Once the crucible is lifted from the furnace it starts cooling down, then skim the metal and more heat is lost, it is then poured into a damp sand mould which will draw the heat away very quickly. If you want the mould to fill fully, the metal must be far higher than its melting temp.
.
But these temps. are very low by foundry standards
start looking at cast iron and how high you need to get it to pour thin castings!
This brings us back to burning enough fuel to get the job done, with cast iron it's a hell of a lot! That's the great thing with waste oil, there's plenty of it available and it's FREE (hey! it's my web site, I'm allowed to "plug" my book!)
.
The bottom line here is; Do your best to keep the heat losses of your furnace to a minimum, and make sure you're burning enough fuel with the correct amount of air to get the job done.
And most importantly, waste oil is the cheapest way to do it!! (ok so I slipped in another plug!)
*******************
Refractories
.
.
In the not too distant past, the only refractory material available for furnace linings was whatever clay could be found locally. Some clays were better than others for withstanding the heat, but without a good transport system to move them around, you made do with what you had to hand.
You then repaired or re-lined your furnace as required, a lot of the time this was every time the furnace was used!
Fire clay comes from coal mines (so I've been told) so it wasn't readily available everywhere, but it is capable of withstanding quite high temperatures.
.
I built all of my early furnaces using clay either from my garden, or the ditch at the top of my road, even for my first iron casting experiments.
This stuff was available and free, what more can you ask for! If I hadn't become so involved in ways to cast iron, I would still be using it myself today.
.
Clay on its own has a couple of problems; firstly as it dries out it shrinks and cracks, secondly it can crack easily when subjected to rapid heat changes (thermal shock).
.
Traditionally "grog" is mixed with the clay to cut down on the shrinkage, grog is clay that has been fired and smashed up into something like sand.
Since it has been fired, it won't soften up and expand when it gets wet, but it will still absorb moisture which allows it to bond with fresh clay making a very strong mix. It can be added to the clay as much as 2/3rds of the mix so only 1/3rd of the finished "brew" is subject to shrinkage.
.
However smashing up old bricks etc. to make grog is time consuming, so often people (including myself) use sand instead. The problem with sand is it isn't absorbent, it's made up with small rocks so it's only suspended within the clay not bonded to it. So a lining made with sand is very weak and crumbly compared to a grog/clay mix.
One misconception people seem to have is that a lining can be fired by lighting a fire inside it. We are using the clay because it has reasonable insulating qualities, this actually prevents the clay from firing!
.
To fire the clay properly, the whole mass must evenly reach a temp. just under its melting point, it insulates itself from doing this, don't forget, the heat that does start to reach the outer surface is dissipating to the atmosphere at the same time.
The whole unit must be put into either a kiln or a big fire to do the job.
.
You might see "brews" on the internet containing either pearlite or vermiculite, I don't see much point in this unless you only intend to melt aluminium with a reasonably gentle heat. Both of these materials burn away somewhere in the lower 1100 deg C. bracket. If you have read what I've writen above you'll realise that as soon as you go for brass you'll exceed this temp. straight away and your lining will burn away very quickly!
.
Although the clay might not have much more temp. resistance than this, since the full heat won't be penetrating very deeply, only the surface will start to melt, just glazing it over and it will still last quite a long time before needing repairs.
.
My "home clay" refractory
.
This might need to be adjusted to suit your local clay, this works fine for mine.
1 part clay
1 1/2 parts sand/grog
1 part sawdust
(by volume)
.
The sawdust burns out as the furnace is used leaving a honeycombed lining, this stops it from being so sensitive to thermal shock, also it slows down the heat dissipation so it gives some insulating qualities to the lining.
When the clay is dug from the ground it is compressed and hard to work, also the rest of the ingredients must be mixed with it. I have tried two methods to do this.
One is to try to measure the clay as closely as possible, then put it in a large container and add some water. Chop the clay up with a shovel in the water until you have a thick creamy mix with no lumps, this is not as easy as it sounds! Then add the other ingredients mixing it well.
This will now have to be left to dry out; if you turn it over every day to help it dry evenly, it will also keep mixing it more. This isn't so bad in the summer when it will dry out quite quickly, but it will take a long time in the winter! I only used this method once and got fed up waiting for it to dry.
.
The second method I prefer , I use an old ironing board as a giant cheese grater to grate the clay. By twisting the mesh of the board with long nose pliers it works well.
.
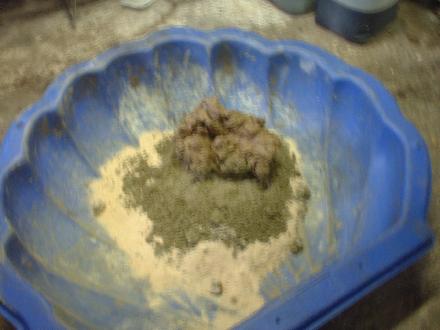
Unfortunatly these pictures are blured!
This shows the ingredients ready for "grating"
.
.
.
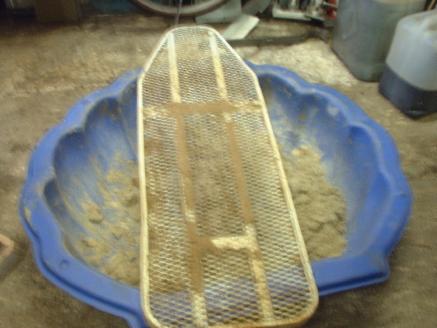
This shows my ironing board grater, any reasonably strong mesh within a frame would do the job
.
I grate it through once, then mix in the other ingredients and keep grating it until it's all mixed well.
I usually find this will be ready to ram up in the furnace as soon as the gratings finished, providing the clay wasn't too wet to start with. The mix needs to be as dry as you can get it, only just damp enough to bond together when firmly rammed, don't forget, the more moisture, the more it will shrink and crack as it dries!
.
Don't bother waiting for the clay lining to dry out before you light a fire in it, only the internal surface will lose any water, the shell of the furnace will prevent any other evaporation. It will take forever to dry out, and due to uneven drying it will crack anyway. I would be very suprised if it didn't develop some cracks from the fire, simply dampen this area with water then ram some more refractory in them and carry on (once it has cooled down!).
If you can find fire clay locally it's easier to use, but you have to buy it! It comes as a powder so mixing the ingredients together dry is a very simple job, then add only just enough water to bond it all together. Leave this for around 24 hours, then start ramming!
This will give you a higher temp. lining, but if you seriously want to melt cast iron, it will burn away quite quickly.
.
Personally I feel it's now time to go for a commercial refractory, although it will have noticably less insulating properties compared to the clay mix. This is something to bear in mind while designing your furnace.
If you're going to build my furnace go for comercial refractory, look what happened to Marvin's fire clay lining!