The Guest Gallery
.
.
These are other people's furnaces either built to my design, or their existing furnaces modified to my waste oil system. Please send me your pictures and comments to be added here!
.
Click on the pictures on this page for a larger view
.
.
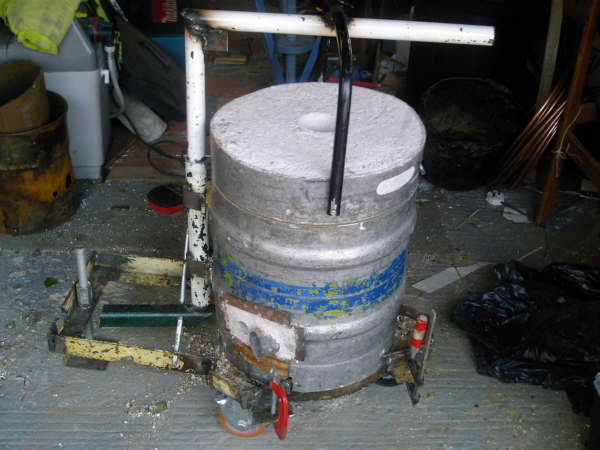
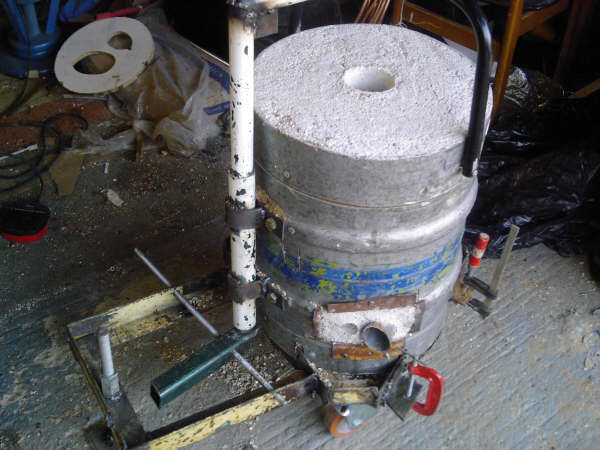
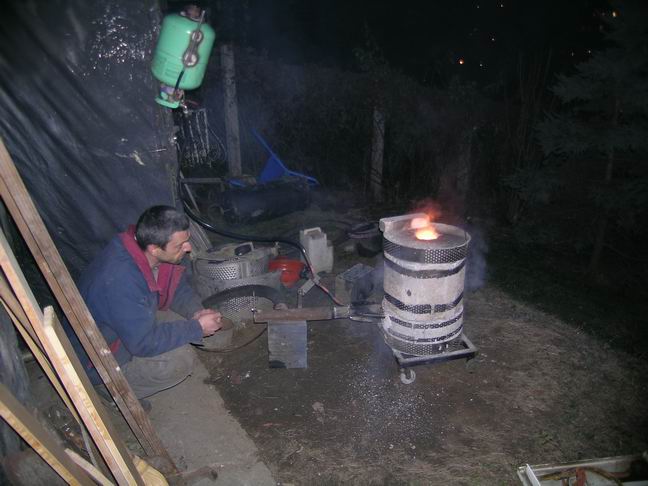
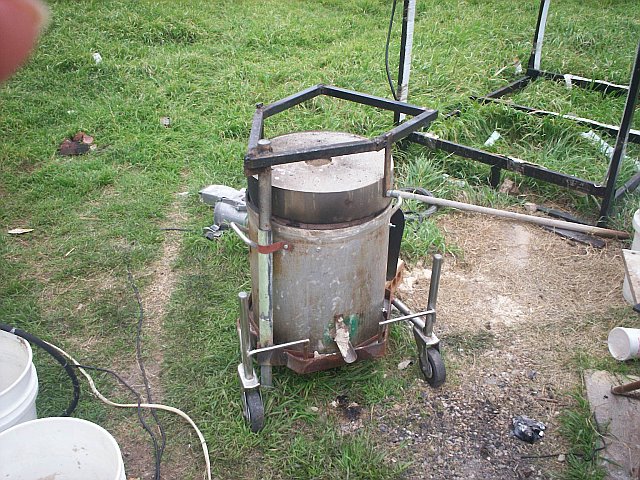
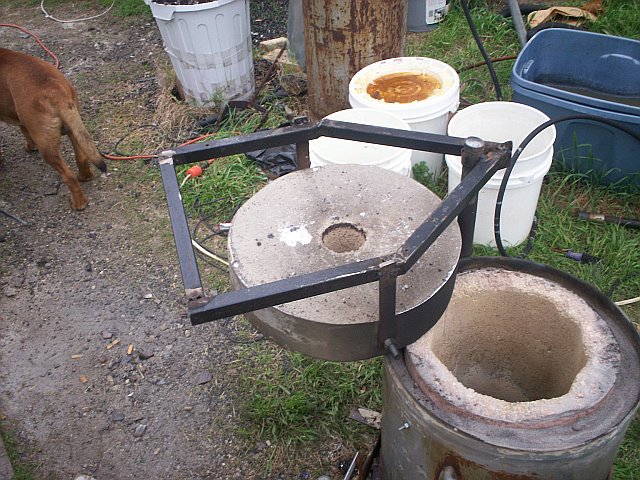
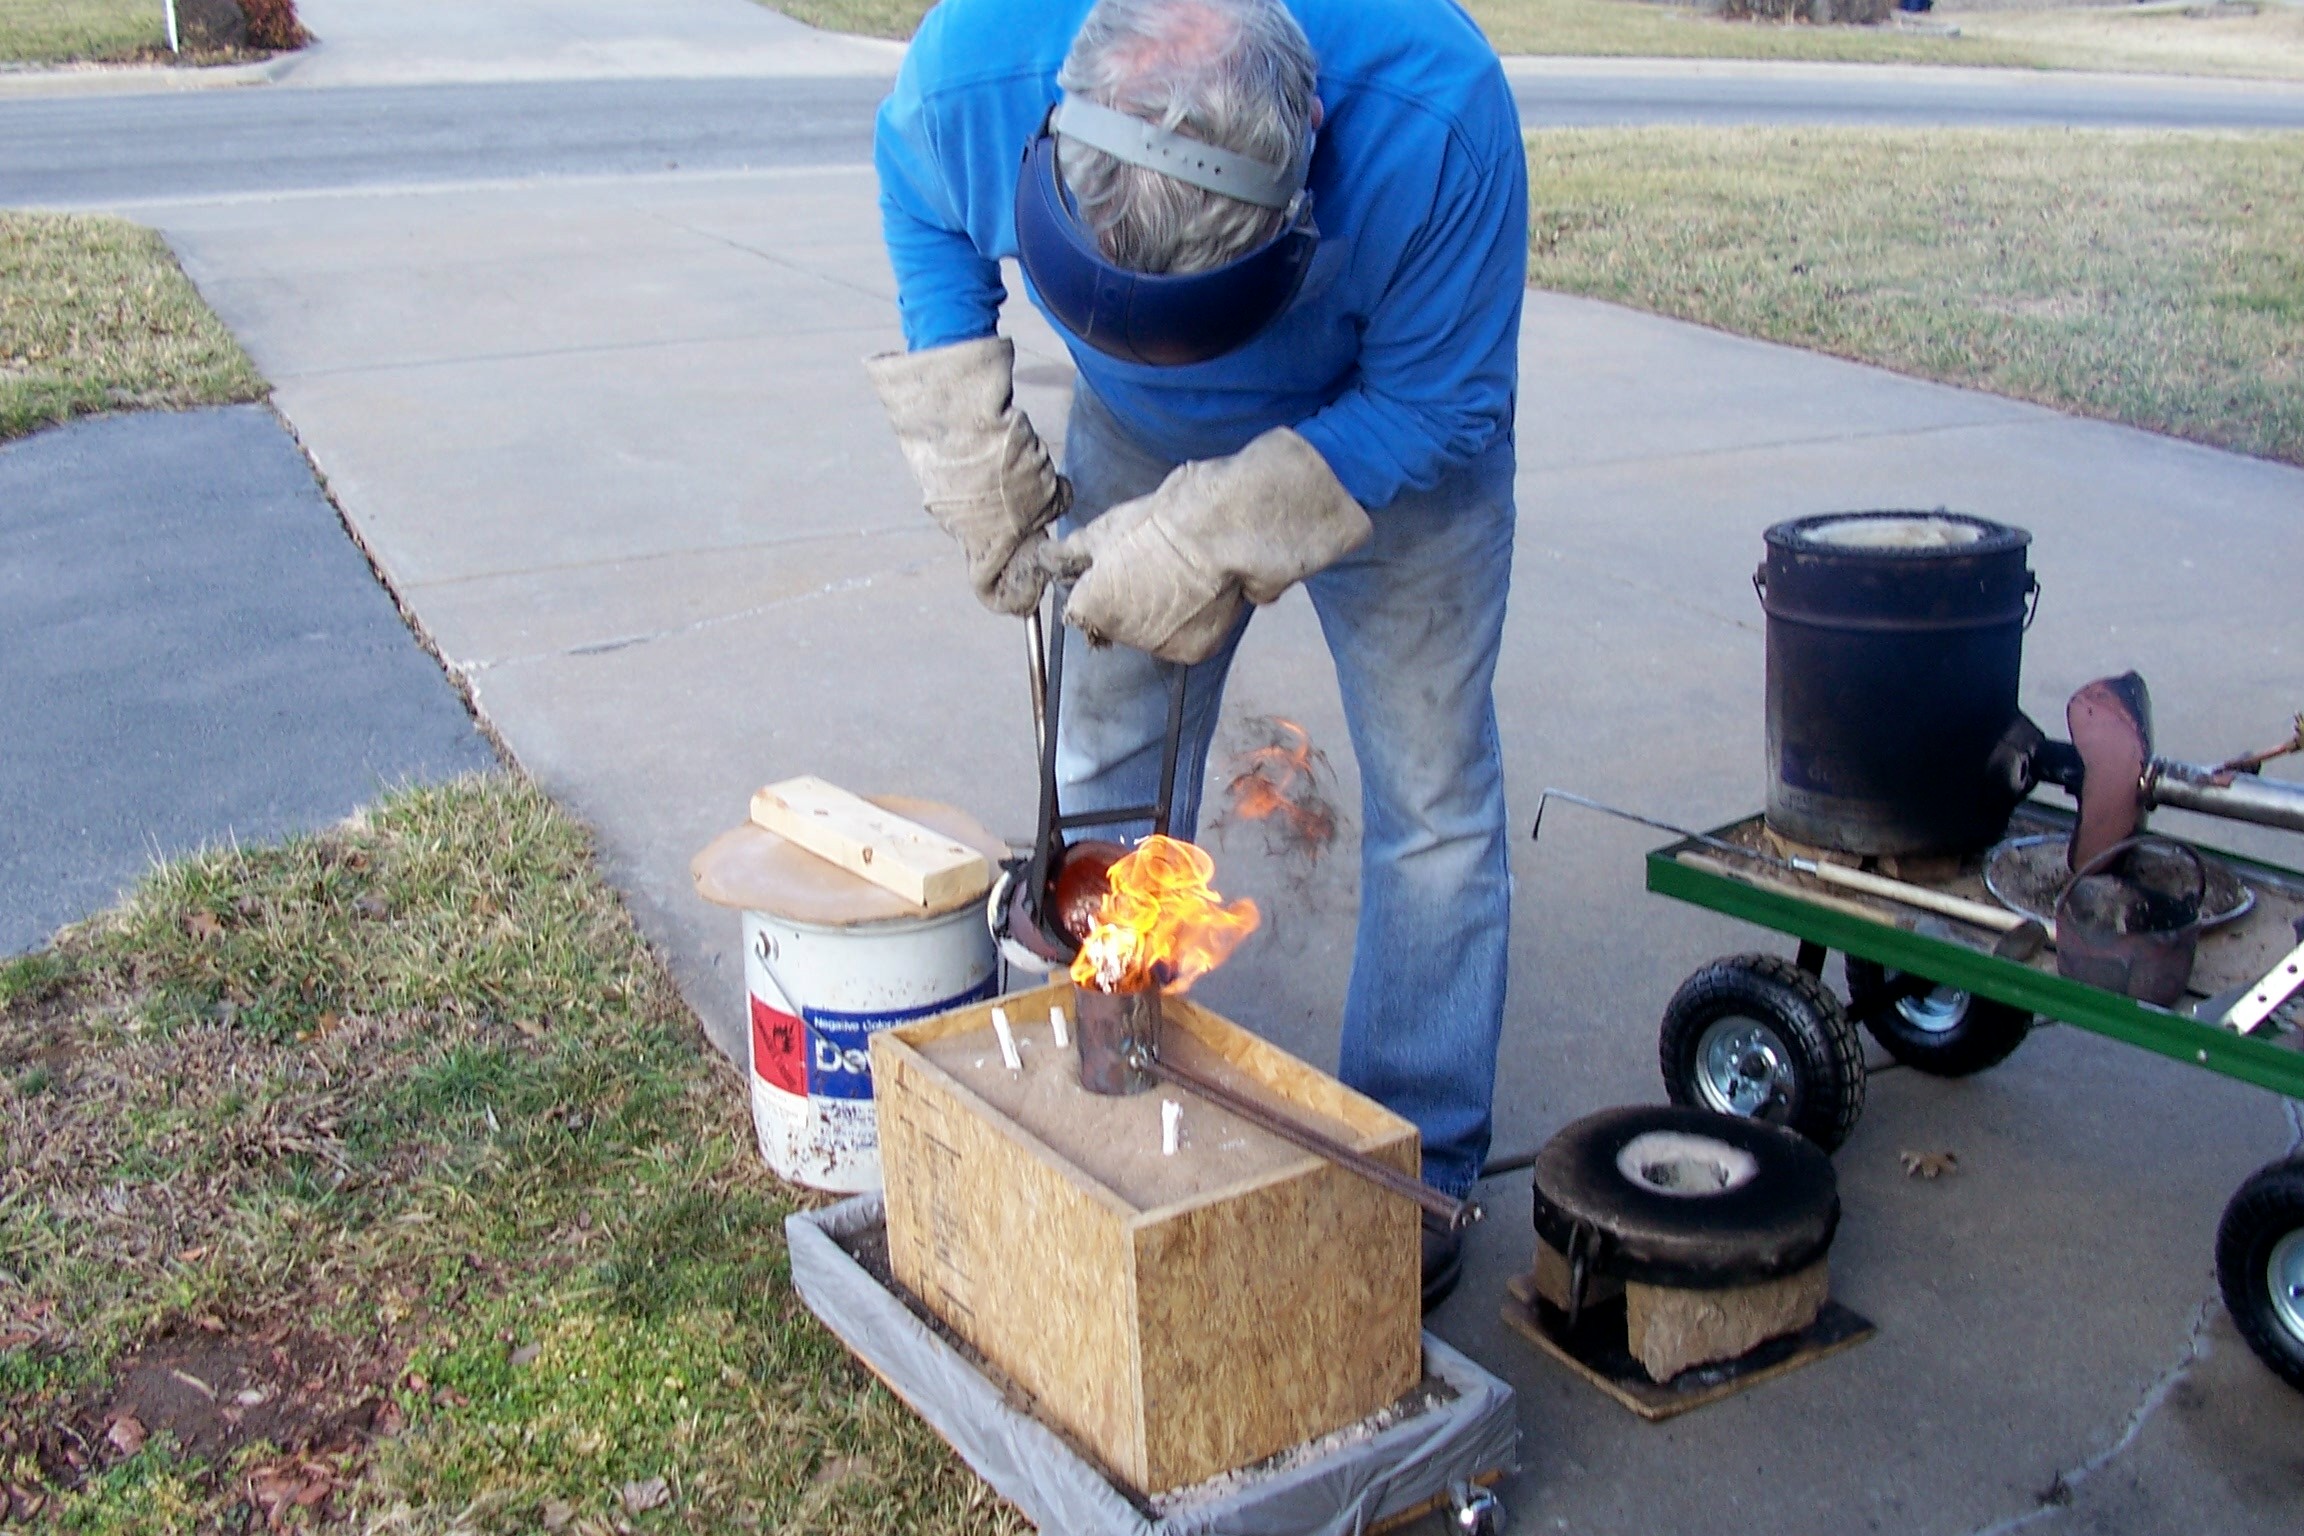
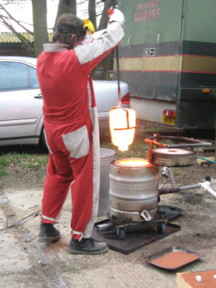
Marvin's Monster
.
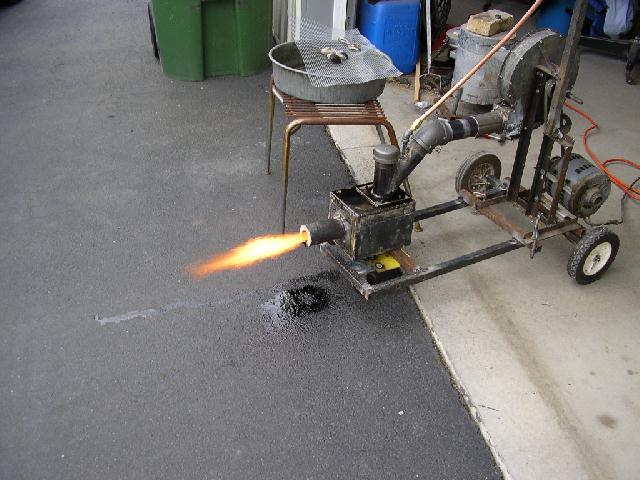
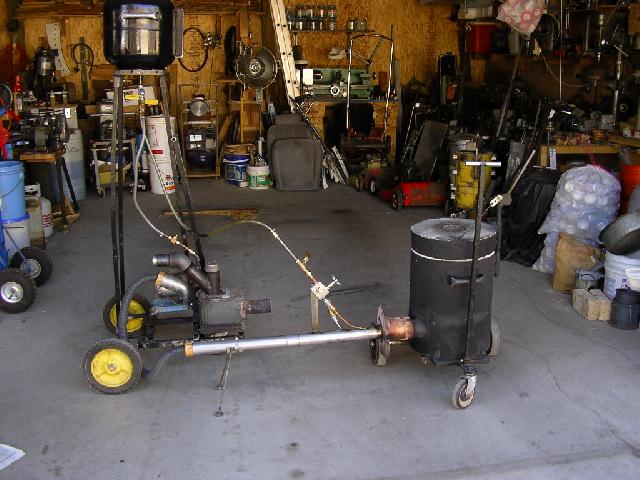
Marvin's original burner Marvin's "duel oil burner" rig
.
Marv's book is a must for everyone who has built, or is intending to build a Gingery lathe! <click here for details>
.
Marvin contacted me after seeing my furnace in the guest pages of Back Yard Metal Casting, I was just starting on my book, and he was halfway through building this furnace to run on a popular oil burner shown on the internet. He has now modified it to my waste oil system, although he is still experimenting with the original burner and has set up both systems on the rig shown above.
Marvin cranked his furnace up with The Artful Bodger's system with mixed results! After many years of casting, he has now melted his first cast iron, unfortunatly he melted his furnace at the same time!
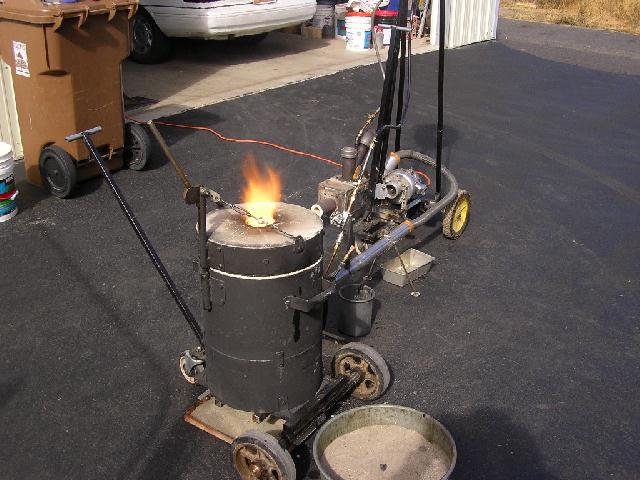
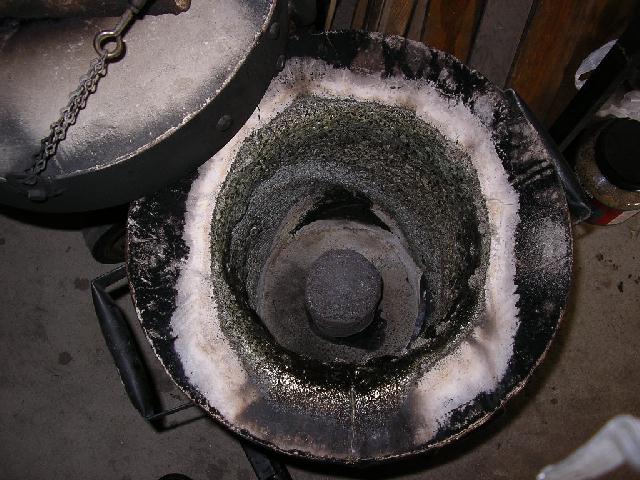
Half an A6 crucible was the best he could do,because when he opened the furnace up to top up the crucible, he realised his furnace was melting faster than the iron! The fire clay based lining he'd used just wasn't up to the intense heat he could now generate.
He assures me he is as pleased as punch with the outcome, and will now re-line his furnace with a suitable high temperature refractory and be ready for action again!
Marvin has a collection of furnaces and is quite a Gingery fan, have a look at Marvin's site for more details.
The great thing with the internet is the ability to make really good friends all over the world, it would be nice to meet them all one day, Marv would be at the top of my list!
.
Update
In a recent email Marv sent me he added this comment;
"I think anyone doing home foundry or are interested in home foundry is missing the boat if they don't buy your book. Your used oil system is more economical to put together and to use than anything else I have seen or heard of!
Use that on your web site if you like! I couldn't get over how fast it gets hot, can't wait to get mine up and going again!!!!"
.
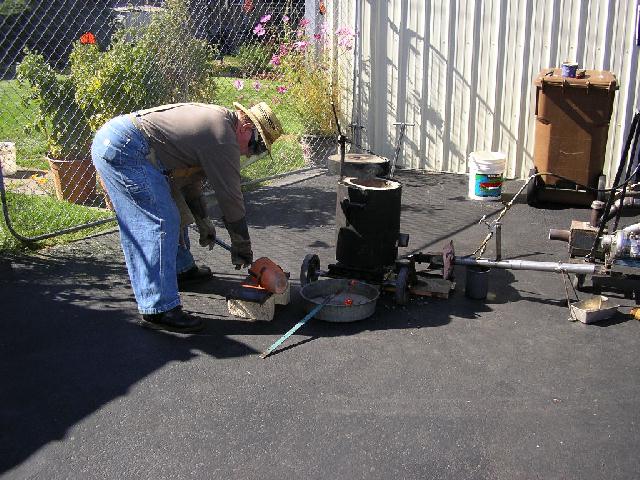
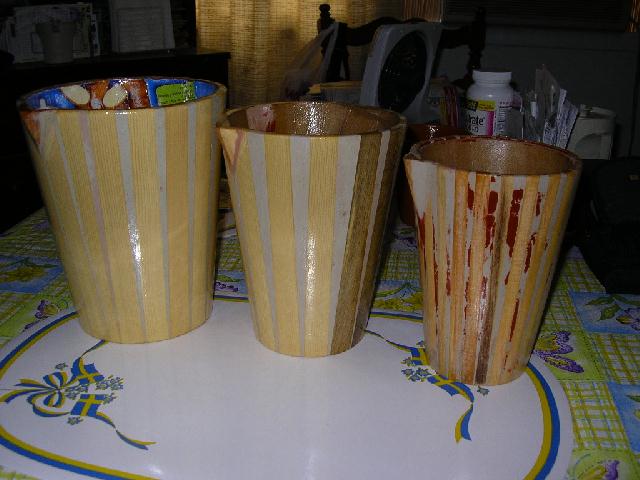
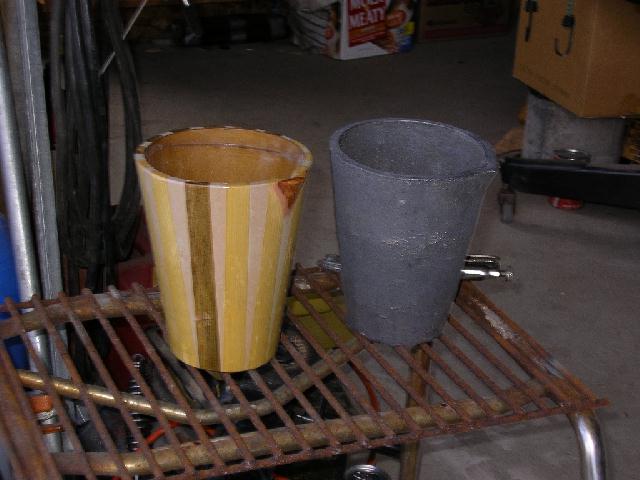
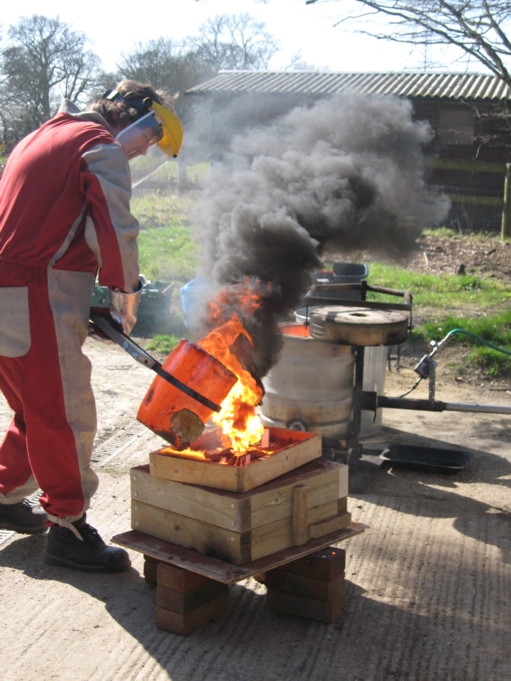
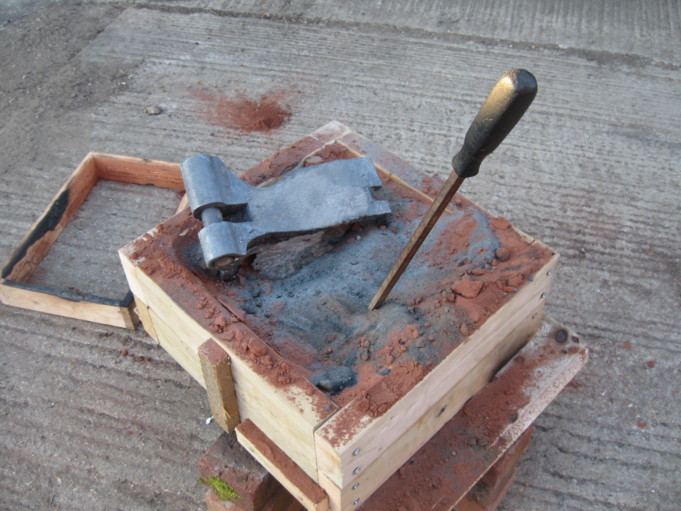
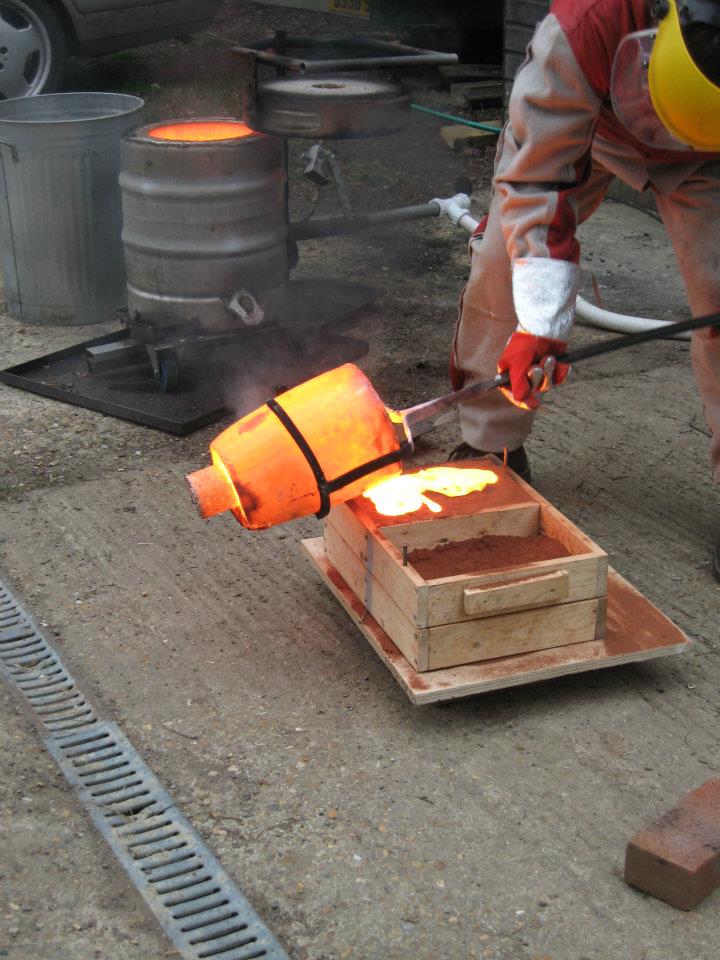
Update 16/10/07
Marv has been up and running again for some while now and I though you might be interested in his home cast, iron crucibles. He's done a very nice job with the patterns!
.
.
.
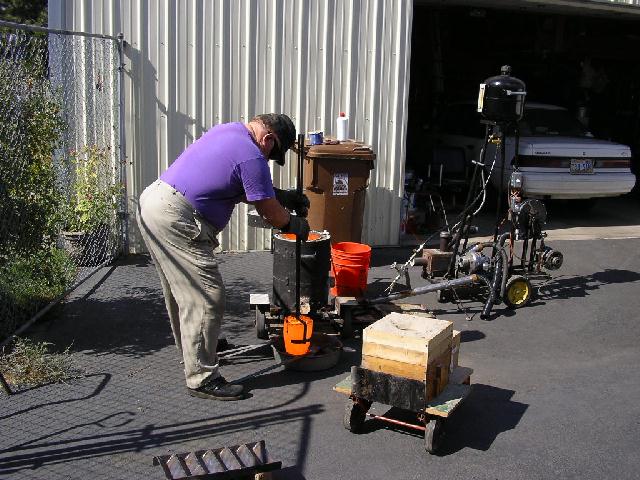
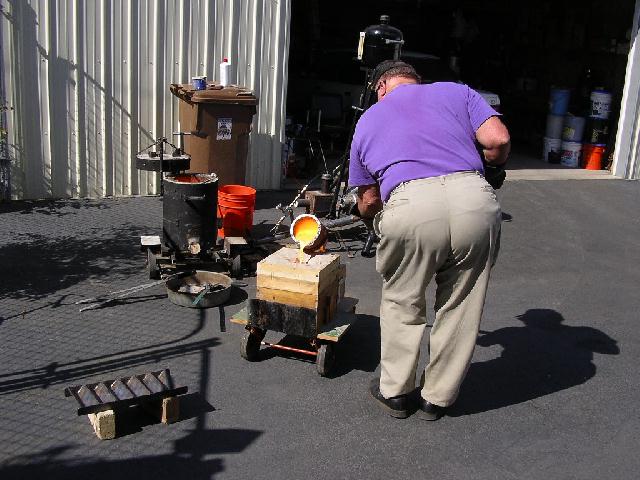
Marv in action pouring cast iron, does he rate highly in "The rear of the year" competition?
**********
.
.
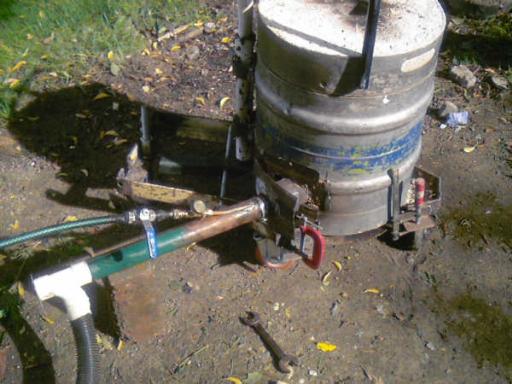
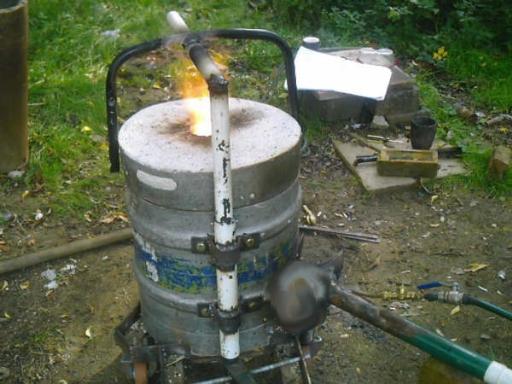
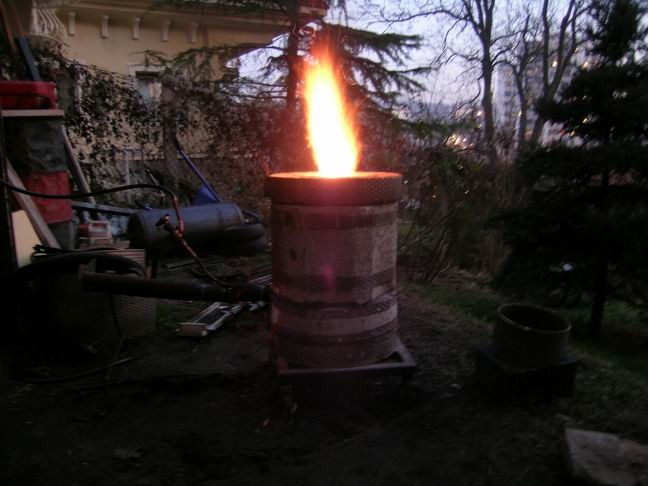
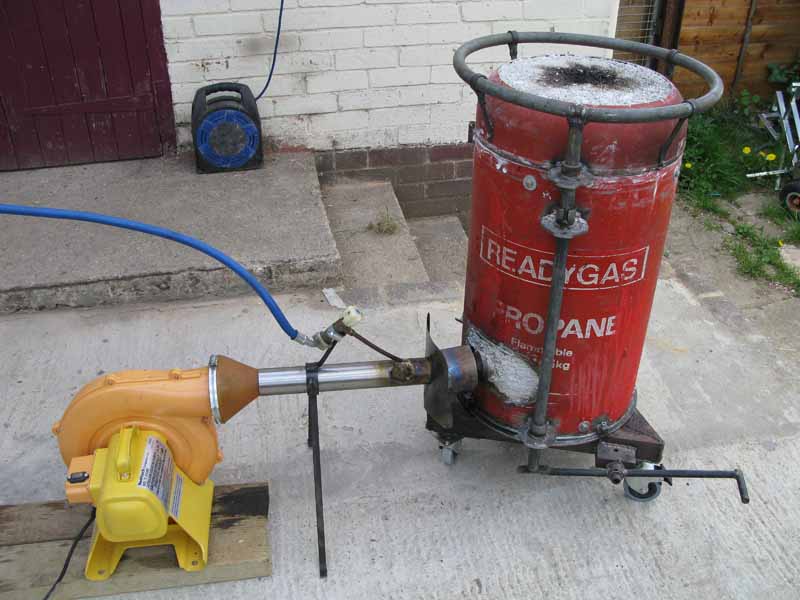
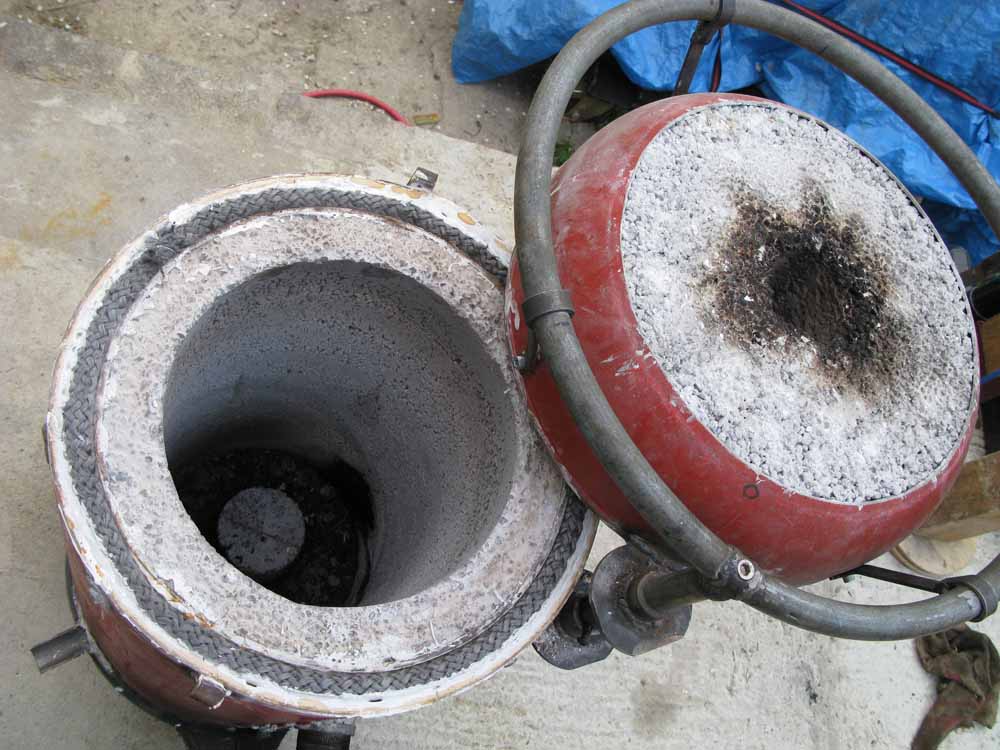
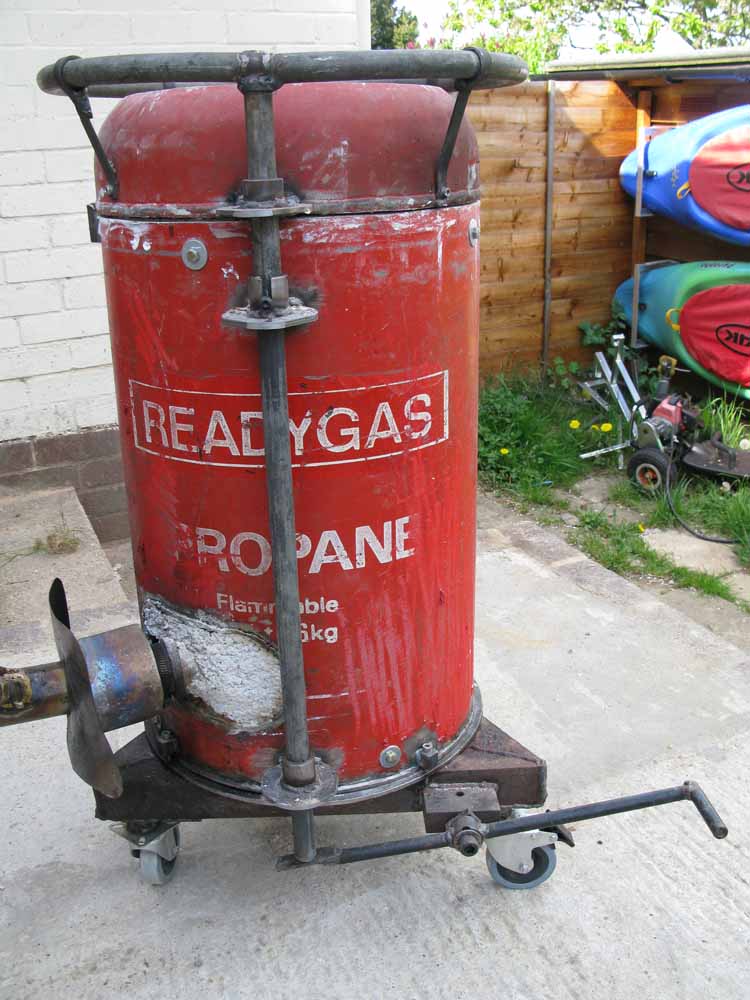
Russell's Furnace
.
.
Russell has also converted the furnace he was building to The Artful Bodger's waste oil system. The lid used in these pictures was causing a few problems, he has now sorted out a better fit with a seal.

A Quote from Russell;
"I know this, anyone using any other alternative fuel rather than WVO and your design, in my opinion is wasting their money and time"
.
Russell's made a new lid and sent me some more pictures
.
.
Russell says " Oh, my furnace gets used a lot, so it's not pretty but I can cast for free..... Russell P.
.
**********
.
Chris's Furnace
.
.
Chris is over here in England not far from where I live, so it was a real pleasure to meet him when he collected his copy of the book in person.
He's still at school, but has already melted cast iron using coke as a fuel.
Chris has built this furnace to my design, but he has adapted it to suit the materials he had to hand, which is how I expect the book to be used, and he's done a good job of it!
Chris has just lit this for the first time and has sent me the pictures, I look forward to hearing of his progress as he uses the furnace to produce his castings.
.
Update
Chris was 14 years old when he bought my book and built this furnace, while he obviously has a great natural practical ability, he doesn't have years of experience to call on, a vast selection of tools available to him, or a big budget to work with.
For people who can't quite believe that my waste oil system / furnace isn't complicated and works as I describe, perhaps this email from Chris will help!
.
Hello Colin
Long time no email!
I haven't had much time to use my furnace because of school work and other things but for the last few months I've had the burner working amazingly! I know what you mean by not letting it get too hot because it gets really hot!
It melts ally in no time and last week I tried cast iron for the first time (sorry no pics, I'll take some next time I use it) I did it in my very old SiC A3 (I know, I should use clay/ graphite but the crucible was almost completely destroyed any way and I had some crappy cast iron scraps I needed to get rid of). And again, it took no time before the cast iron was starting to melt. However I was clumsy not to check how much oil I had and I ran out!! So I have an A3 crucible half full of solidified cast iron, so I don't think I'll be using that crucible for now on. So I've now purchased and received an A6 clay/graphite from JW along with some bentonite clay for new moulding sand. And also do you mix your sand by hand? Because I found an easy way to mix it really well, by bending some 1cm. or so steel rod by say 90 deg. and then putting it in a drill, it does the job well!
How is your furnace, have you built any new ones?
Chris
.
I was dealing with an email asking how complicated the oil burning system was when Chris's email arrived, so I asked him if I could post it, this is part of his email in reply;
.
Hi Colin
No problem at all, go ahead! If it convinces people that if a 15 year old can make it then they could sure make it! Email about complicating machining? The most complicating machining I did was cutting the 2" burner pipe with an angle grinder!nnn
.
Chris wasn't standing at the back of the queue when they were handing out brains! Still he had no difficulty despite his tender years, so..................
.
Update 7/7/07
Chris contacted me a while ago with a video clip of his first iron pour, unfortunately my lack of computer skills means I still haven't figured out how to add clips directly to this site, but I have posted it on "you tube" click on >THIS LINK< to take a look.
These are a couple of extracts from his email;
.
So I lit the furnace up, put in the crucible with the cast iron. Took about 40 mins.to get the A6 3/4 full with 3 top ups.
.
I was very pleased about how easily the furnace melted the cast iron and how fast! As you said, it's pretty much as easy as melting alli.
.
**************
.
.
.
Nebojsa's (and Luka's) Furnace
.
.
Nebojsa over in Serbia kindly contacted me about using a zircon coating in my furnace to protect the lining ( I hope to give this a try shortly, I will put the results on the "furnace updates" page), numerous emails later we are good friends discussing various topics. He and his wife Tamara are involved in metal work and pottery, and he's a dab hand at making what he needs!
He had previously tried casting with waste oil but was having smoke and smell problems, now he is using The Artful Bodger's Waste Oil system in an interesting way!
.
.
Having a surplus fire brick kiln at hand he's converted it to a waste oil furnace. This isn't a perfect conversion as the fire bricks are not rated high enough, and the slight gaps in the construction allow leaks. But for very little work he's casting with waste oil, and that's what it's all about!
.
.
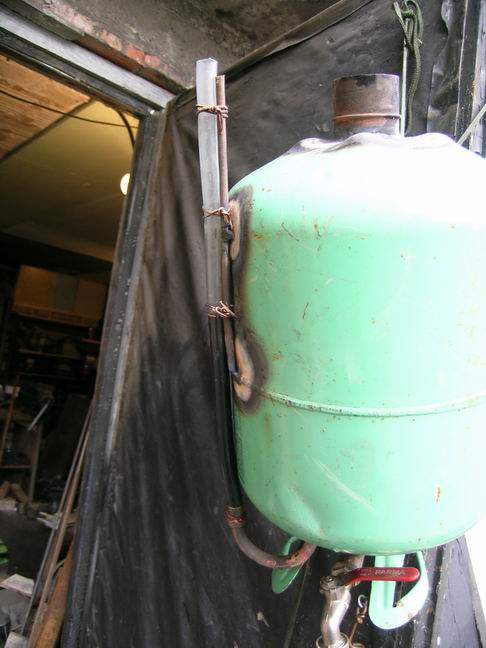
His oil tank is an ex-gas bottle, the pipe running up the side is a very clever but simple fuel gauge.
.
Nebojsa and Tamara now have their own web site, if you truly want to see fantastic work both in metal and pottery then have a look!
.
. **************
.
Clarence's Furnace
.
Clarence has just finished his Artful Bodger's Waste Oil Furnace and lit it for the first time melting alli, brass and cast iron as a test.
He has done an very neat job with the construction, and like Marvin is using a Kirby as a blower.
.
.
.
This is an extract from an email from Clarence;
"Thanks for all your help but you are not done yet as we need help on holding heat in ladles, etc. after removing from the heat. The cast iron melt was in a thin SS bowl and cooled before we could pour. The Alum pour was from a sand bottom and into a cold ladle so all we needed was to preheat the ladle, but all in all extremely pleased with it all, pictures to follow soon and thanks again. C.A."
.
I'm very surprised the stainless steel bowl survived in the furnace, I think if it was left in a while longer it wouldn't have!
Clarence has now ordered a clay/graphite crucible for his cast iron which will be much safer and left in the furnace until the cast iron is nice and fluid, will allow it to retain its heat for a good pour.
.
I hope to hear from Clarence again soon with further updates and some pictures of the furnace in action..
.
**************
.
.
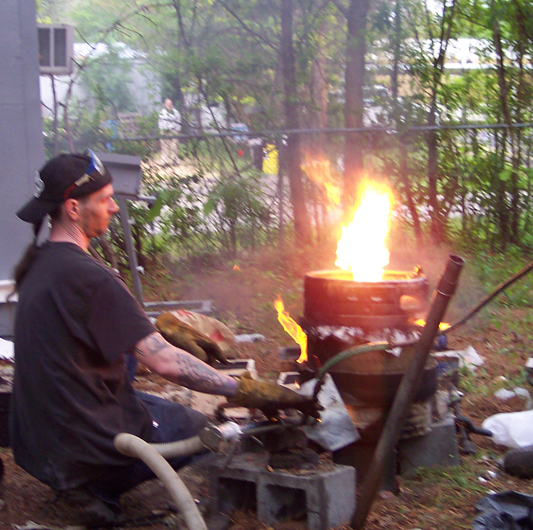
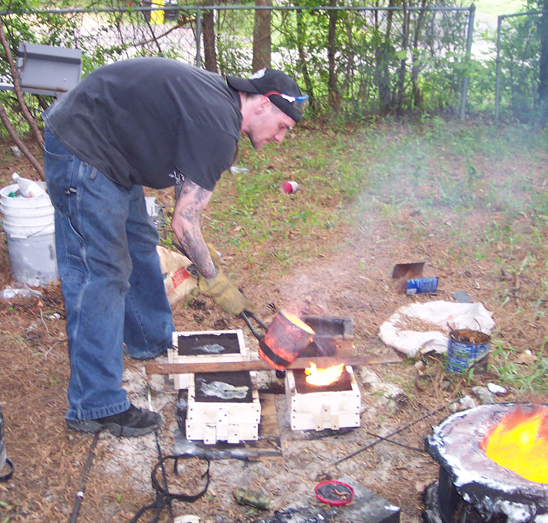
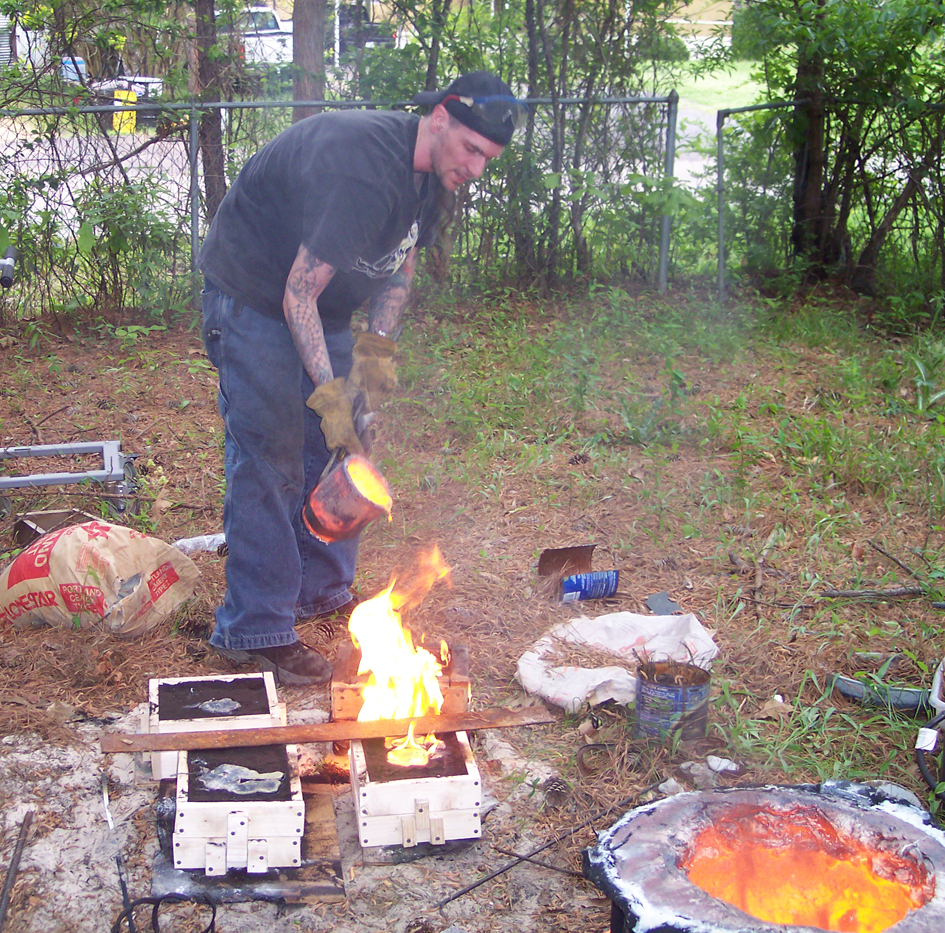
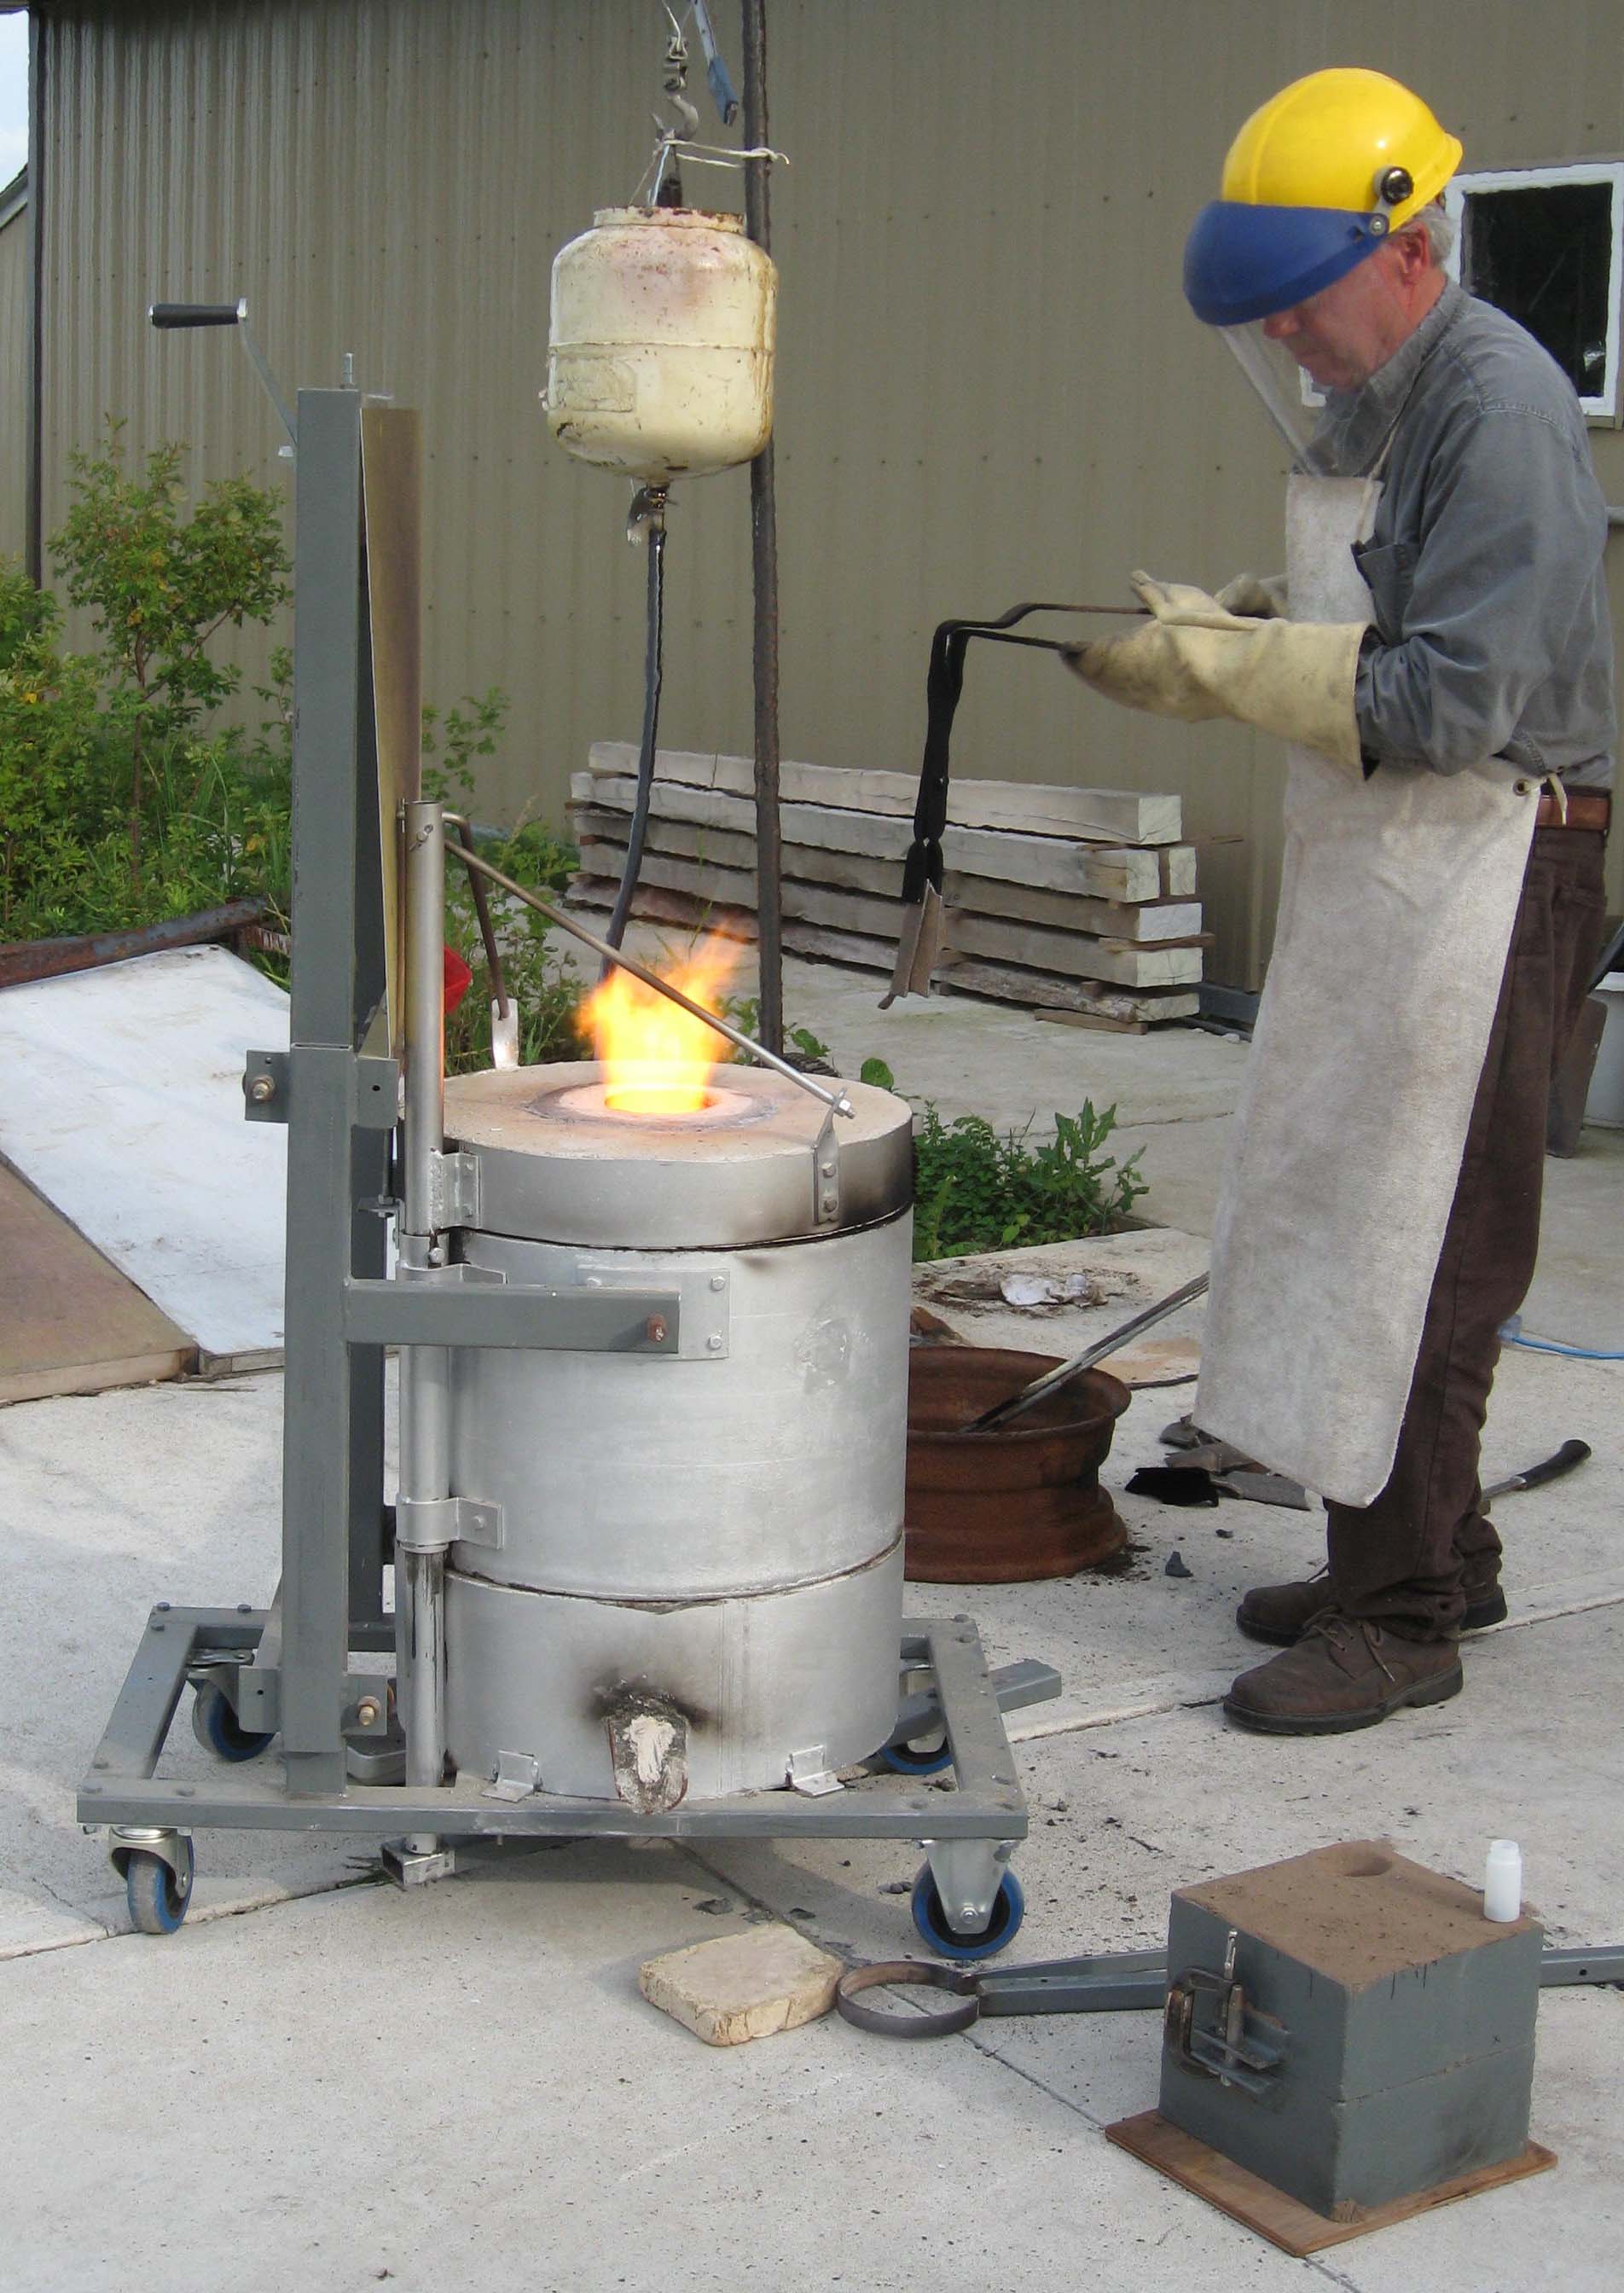
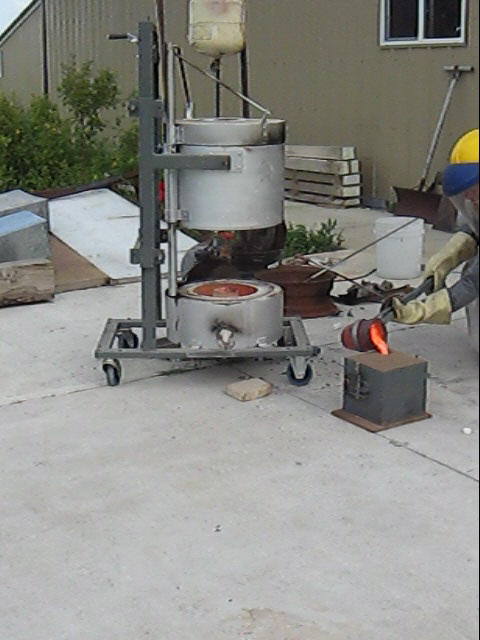
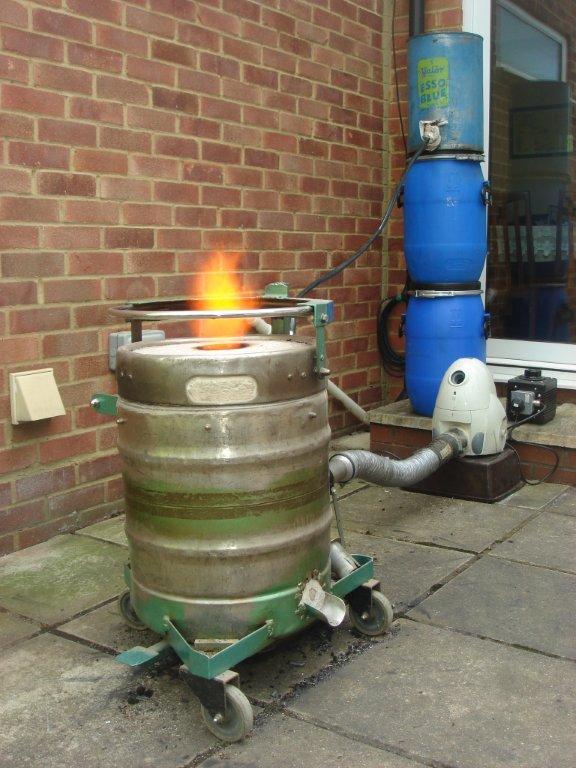
Gene's furnace
.
.
Gene Temple has recently finished his Artful Bodger's Waste Oil Furnace, it could be the sister or brother of mine, a really nice job!!
.
.

.
Click here to see Gene's furnace in action iron casting
He has a couple of videos on you tube if you fancy more.
.
He dried it out and went straight for cast iron, these are some extracts from his emails to me:
.
Over the last 4 1/2 hours I've given it a "burn-in" starting with a gentle wood fire (no forced air) and progressing, slowly, to burning oil! Boy does that puppy burn oil! It's cooling down now, and the inside walls are glowing orange/yellow. There isn't even the hint of doubt that this will melt iron, and melt iron it shall the day after tomorrow!
This has way outperformed my expectations thus far, and I didn't have to tweak anything to get it all to work- just followed the plans!
.
And then;
Yesterday I cast iron! The furnace worked out splendidly!.............
As you can see, I machined the name plate around the edge, just to test the iron. It was extremely machinable and there were no voids or inclusions! I'm delighted! Thank you so much for your wonderful book!
Feel free to use any pictures or quote me as you see fit.
Thanks much, and regards
Gene Temple
.
I think he's quite pleased with his furnace, don't you?
.
.
.
**************
.
.
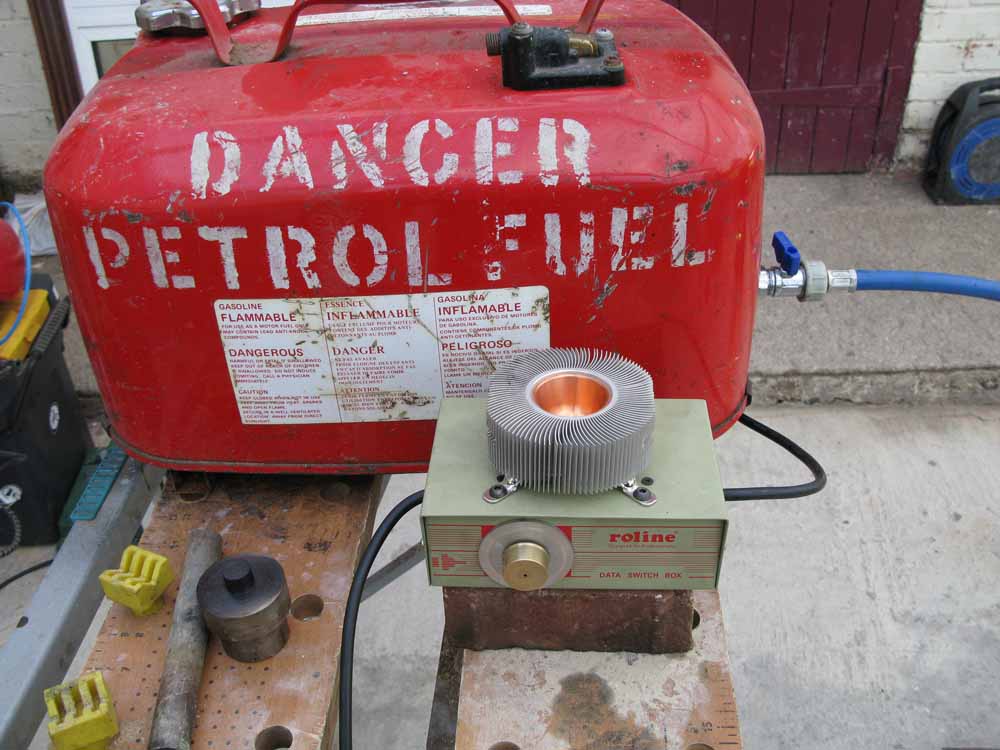
Bert's furnace
.
Bert Jansen from South Africa is also up and running with his Artful bodger's furnace, he's not up to full power from the furnace as his air supply is a little low, something he's sorting out.
.

.
A quote from Bert's email to me;
.
Hi Colin
The furnace was completed a few weeks ago and worked excellently from the first time I started it, had some trouble with a blower from an old tumble drier but after fitting a 3 phase motor it works well.
I have been melting aluminium from old farm irrigation scrap, brass from fittings and copper from old burnout motors and switchgear and have just about cleaned up the place............
Regards Bert
.
I hope for some more pictures and an update from Bert soon
.
.
.
**************
.
.
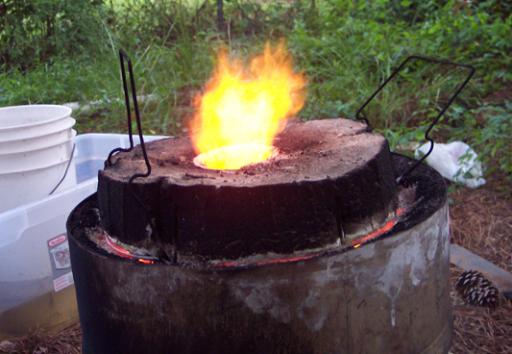
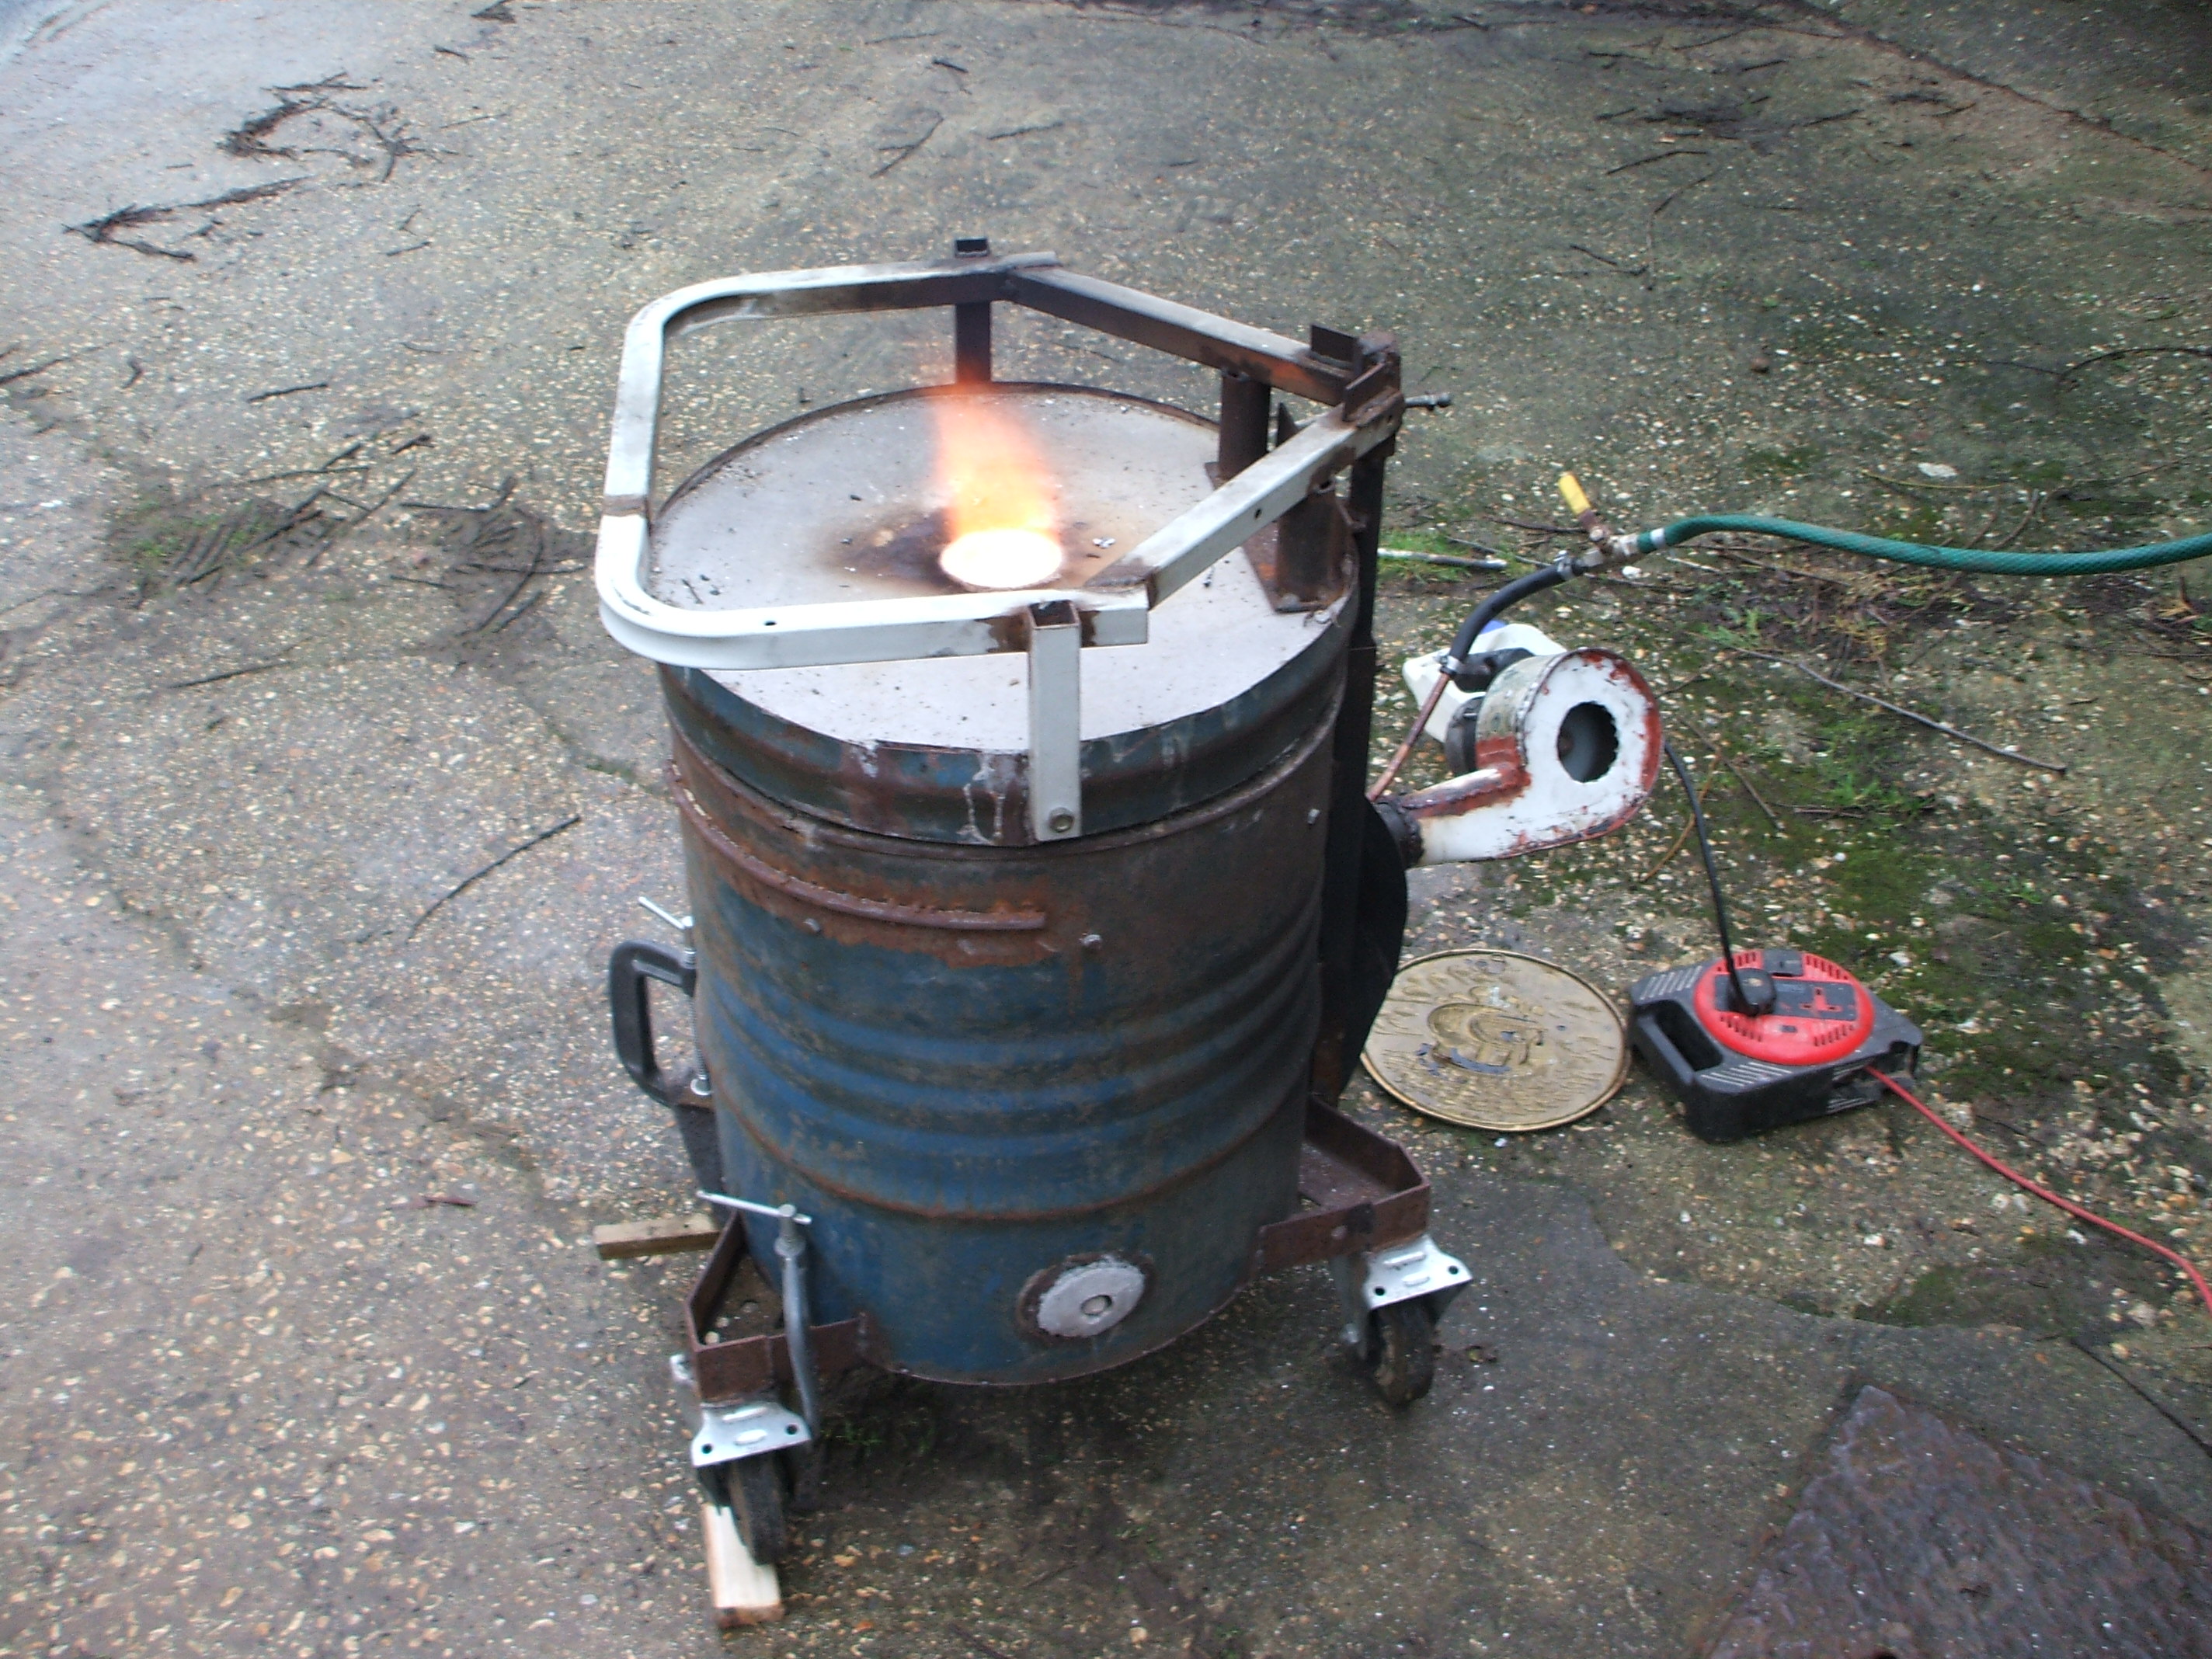
Dan's Furnace
.
.. Dan Manders has finished his furnace and says;
Hey Colin, my furnace is finished and works flawlessly. I made some alterations from your overall design, but the burner set up is straight out of the manual and it's worked perfectly since the first time I fired it up, something you might want to note on your site. Here's two photos you can post on your website if you like.
.
Also here's a video of my first iron pour, a little chaotic, but it came out just fine!
(click this link to see the video)
.
I don't think I need to add anything else, do I?
.
.
**************
.
.
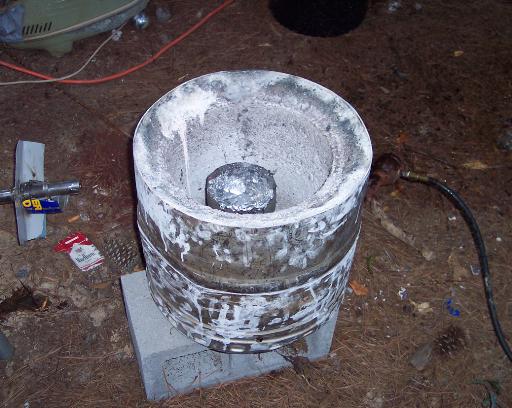
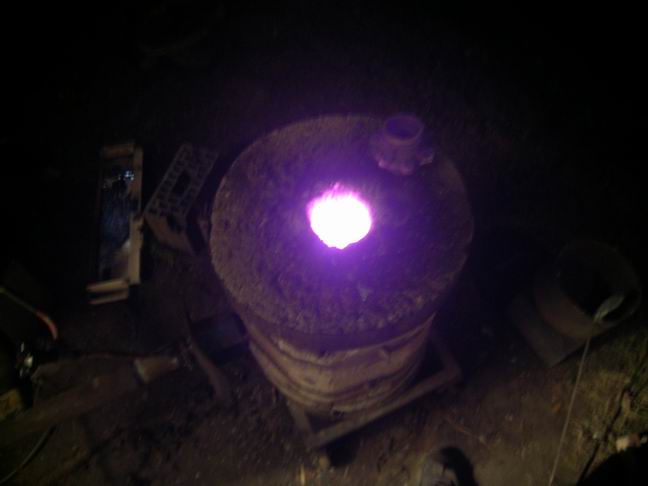
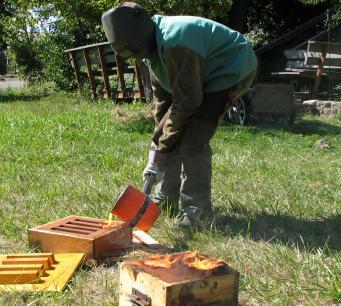
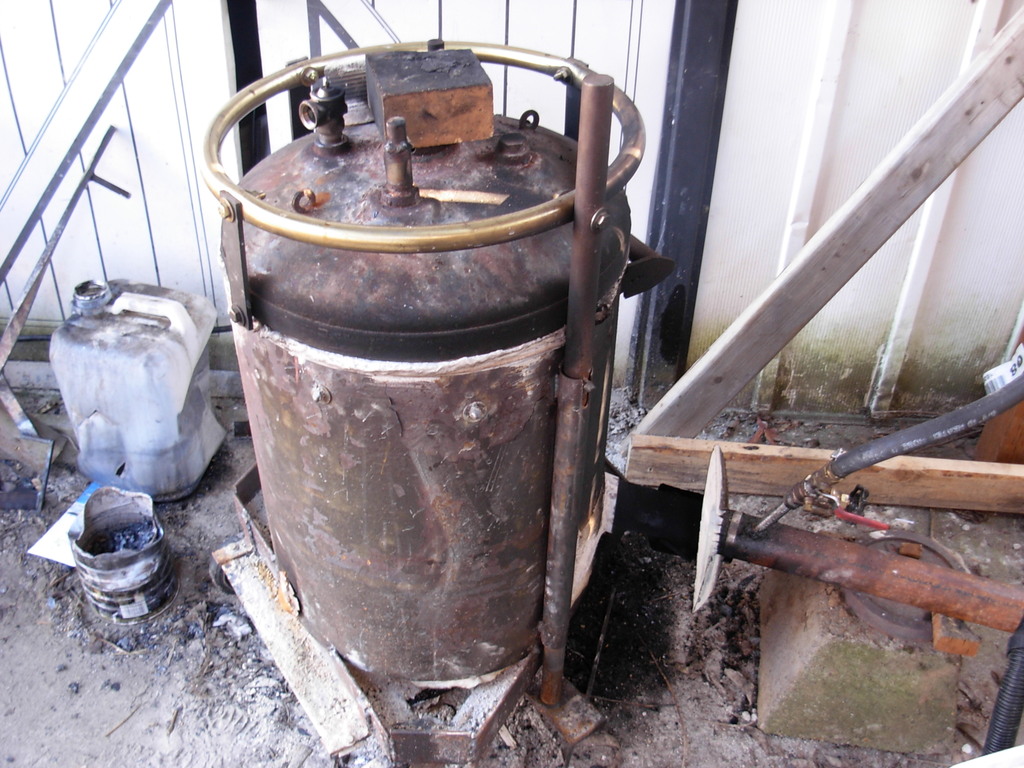
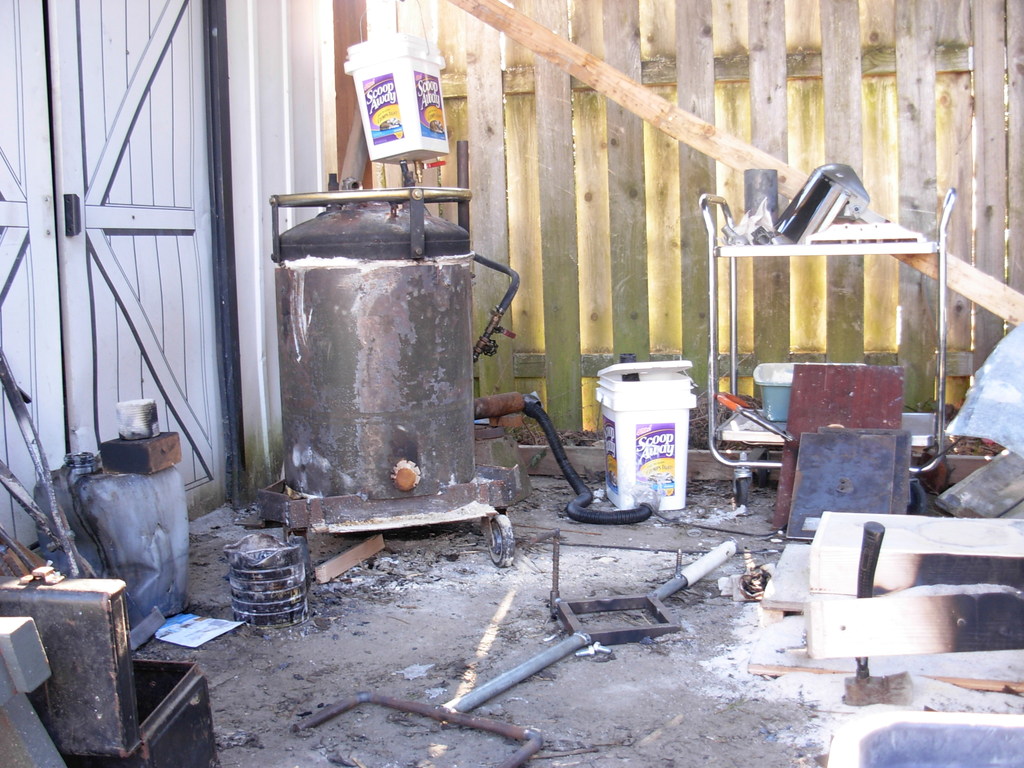
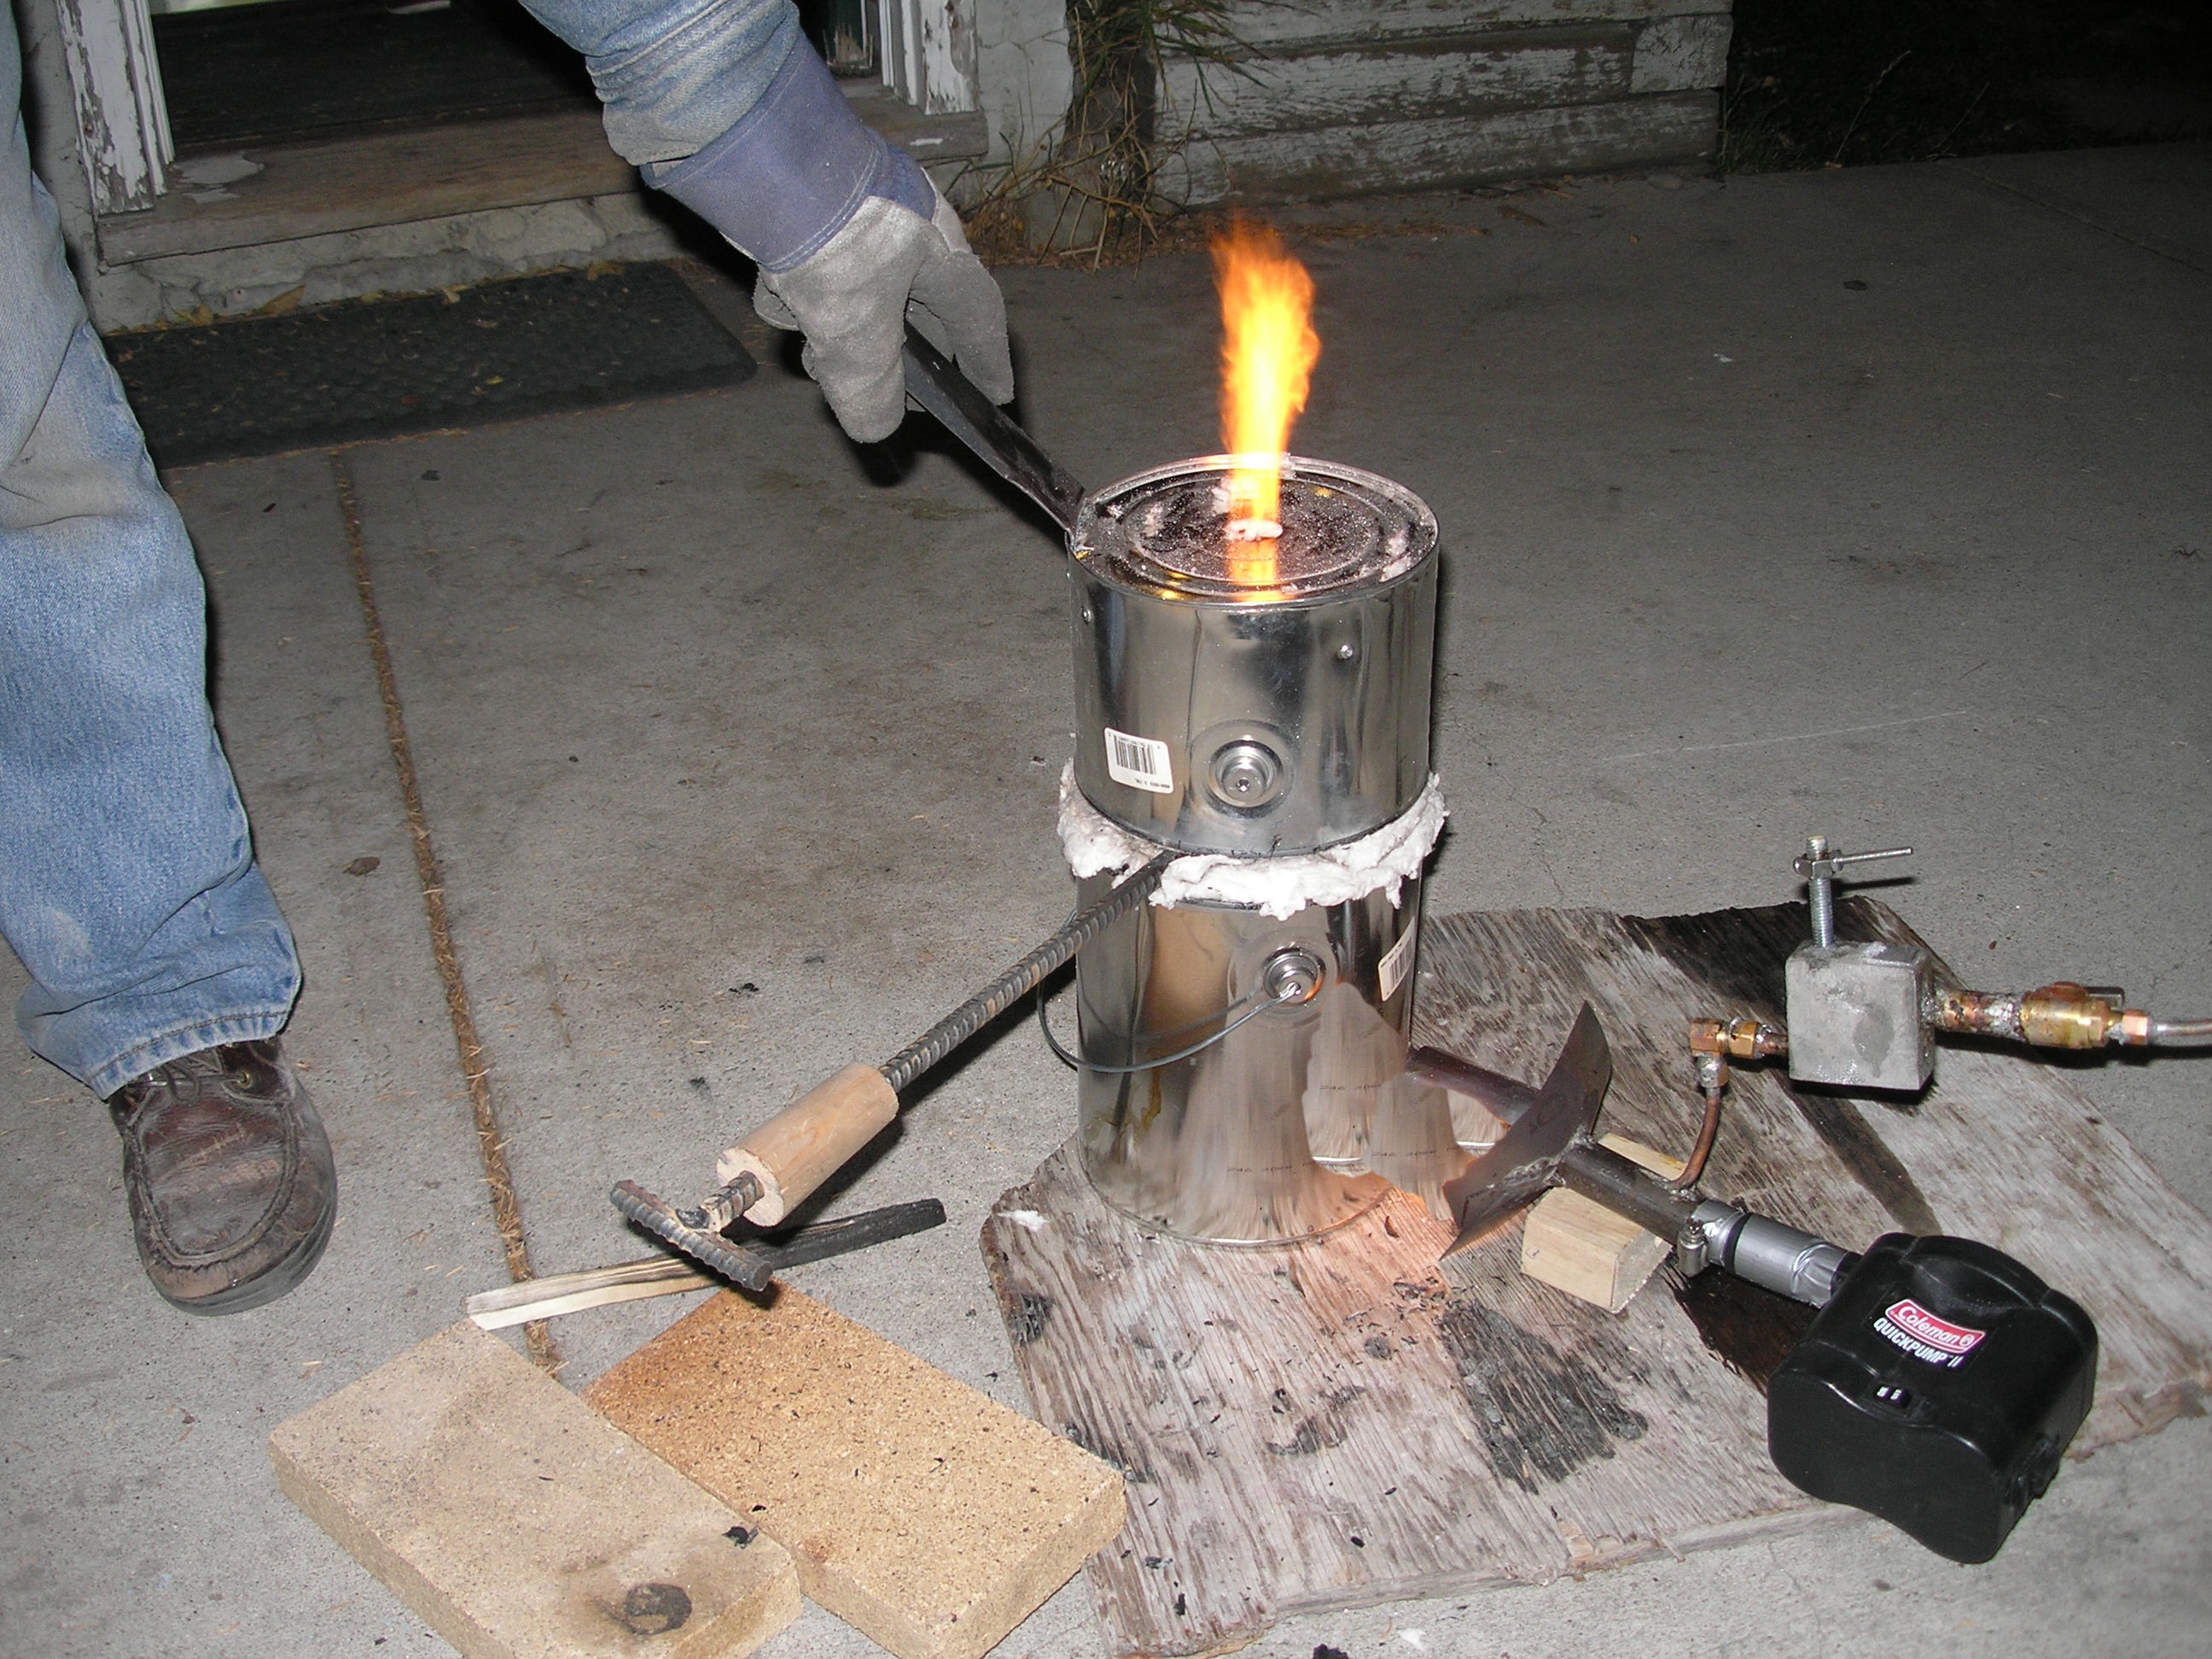
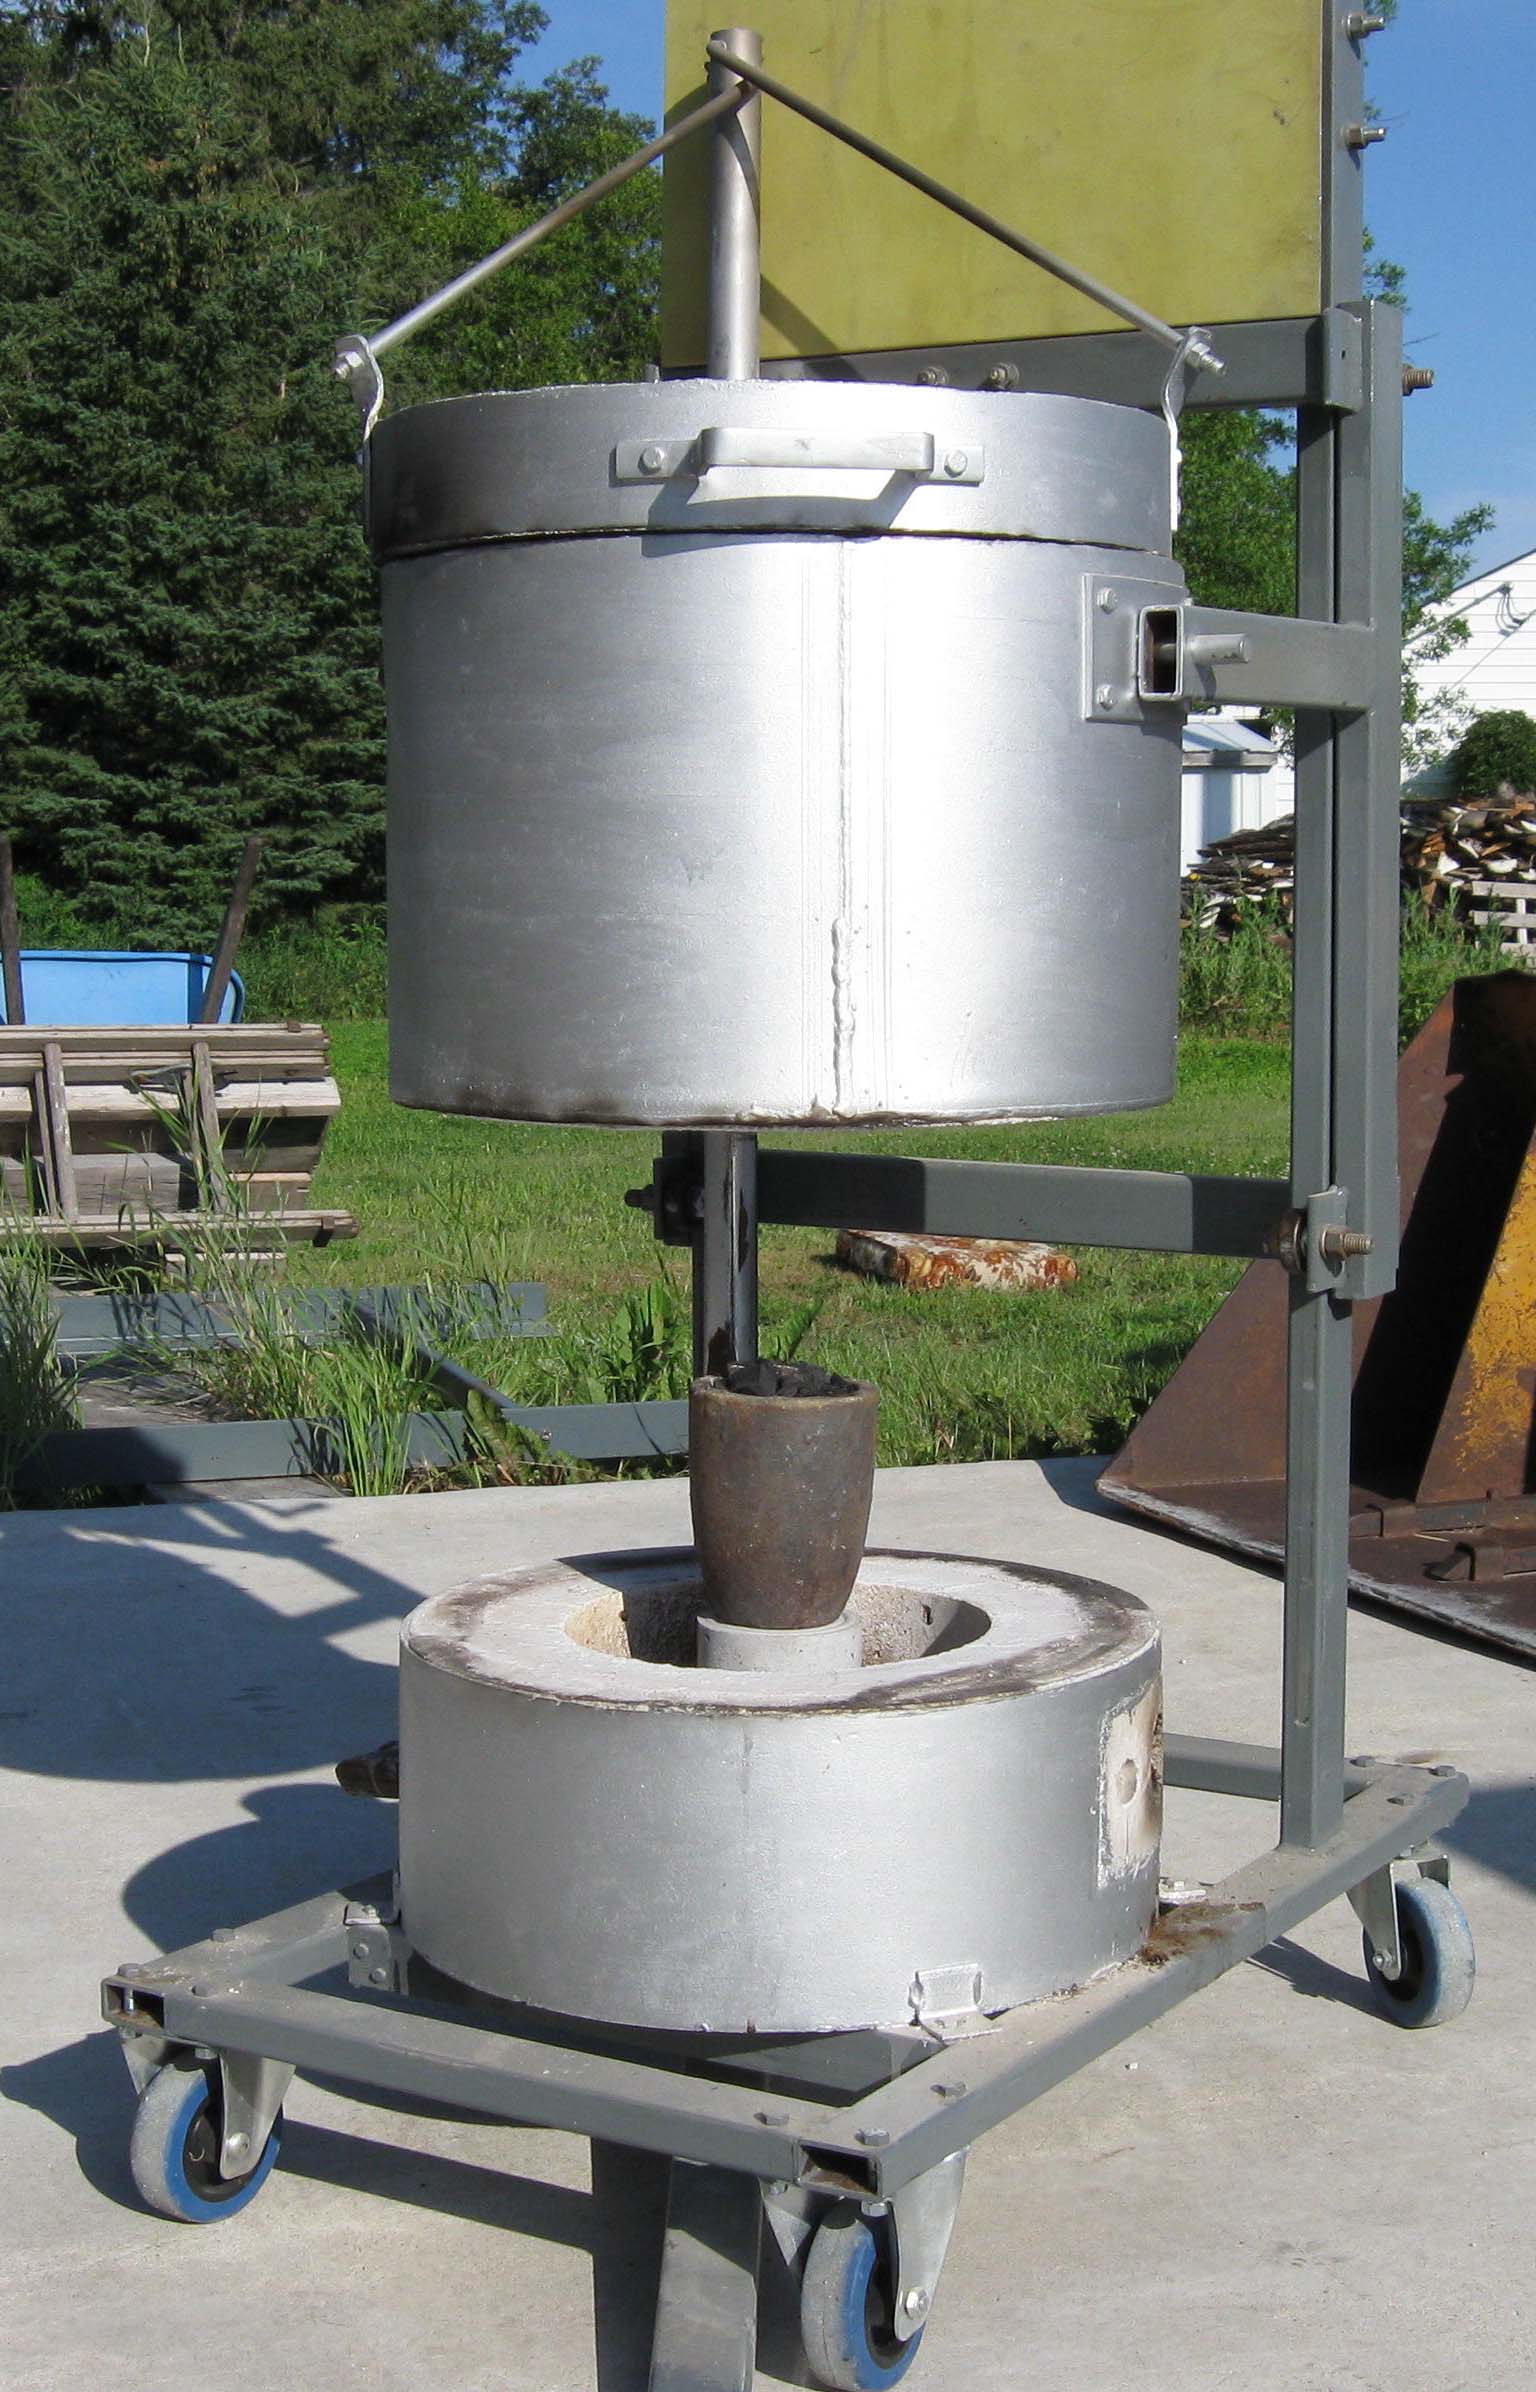
Don's furnace
.
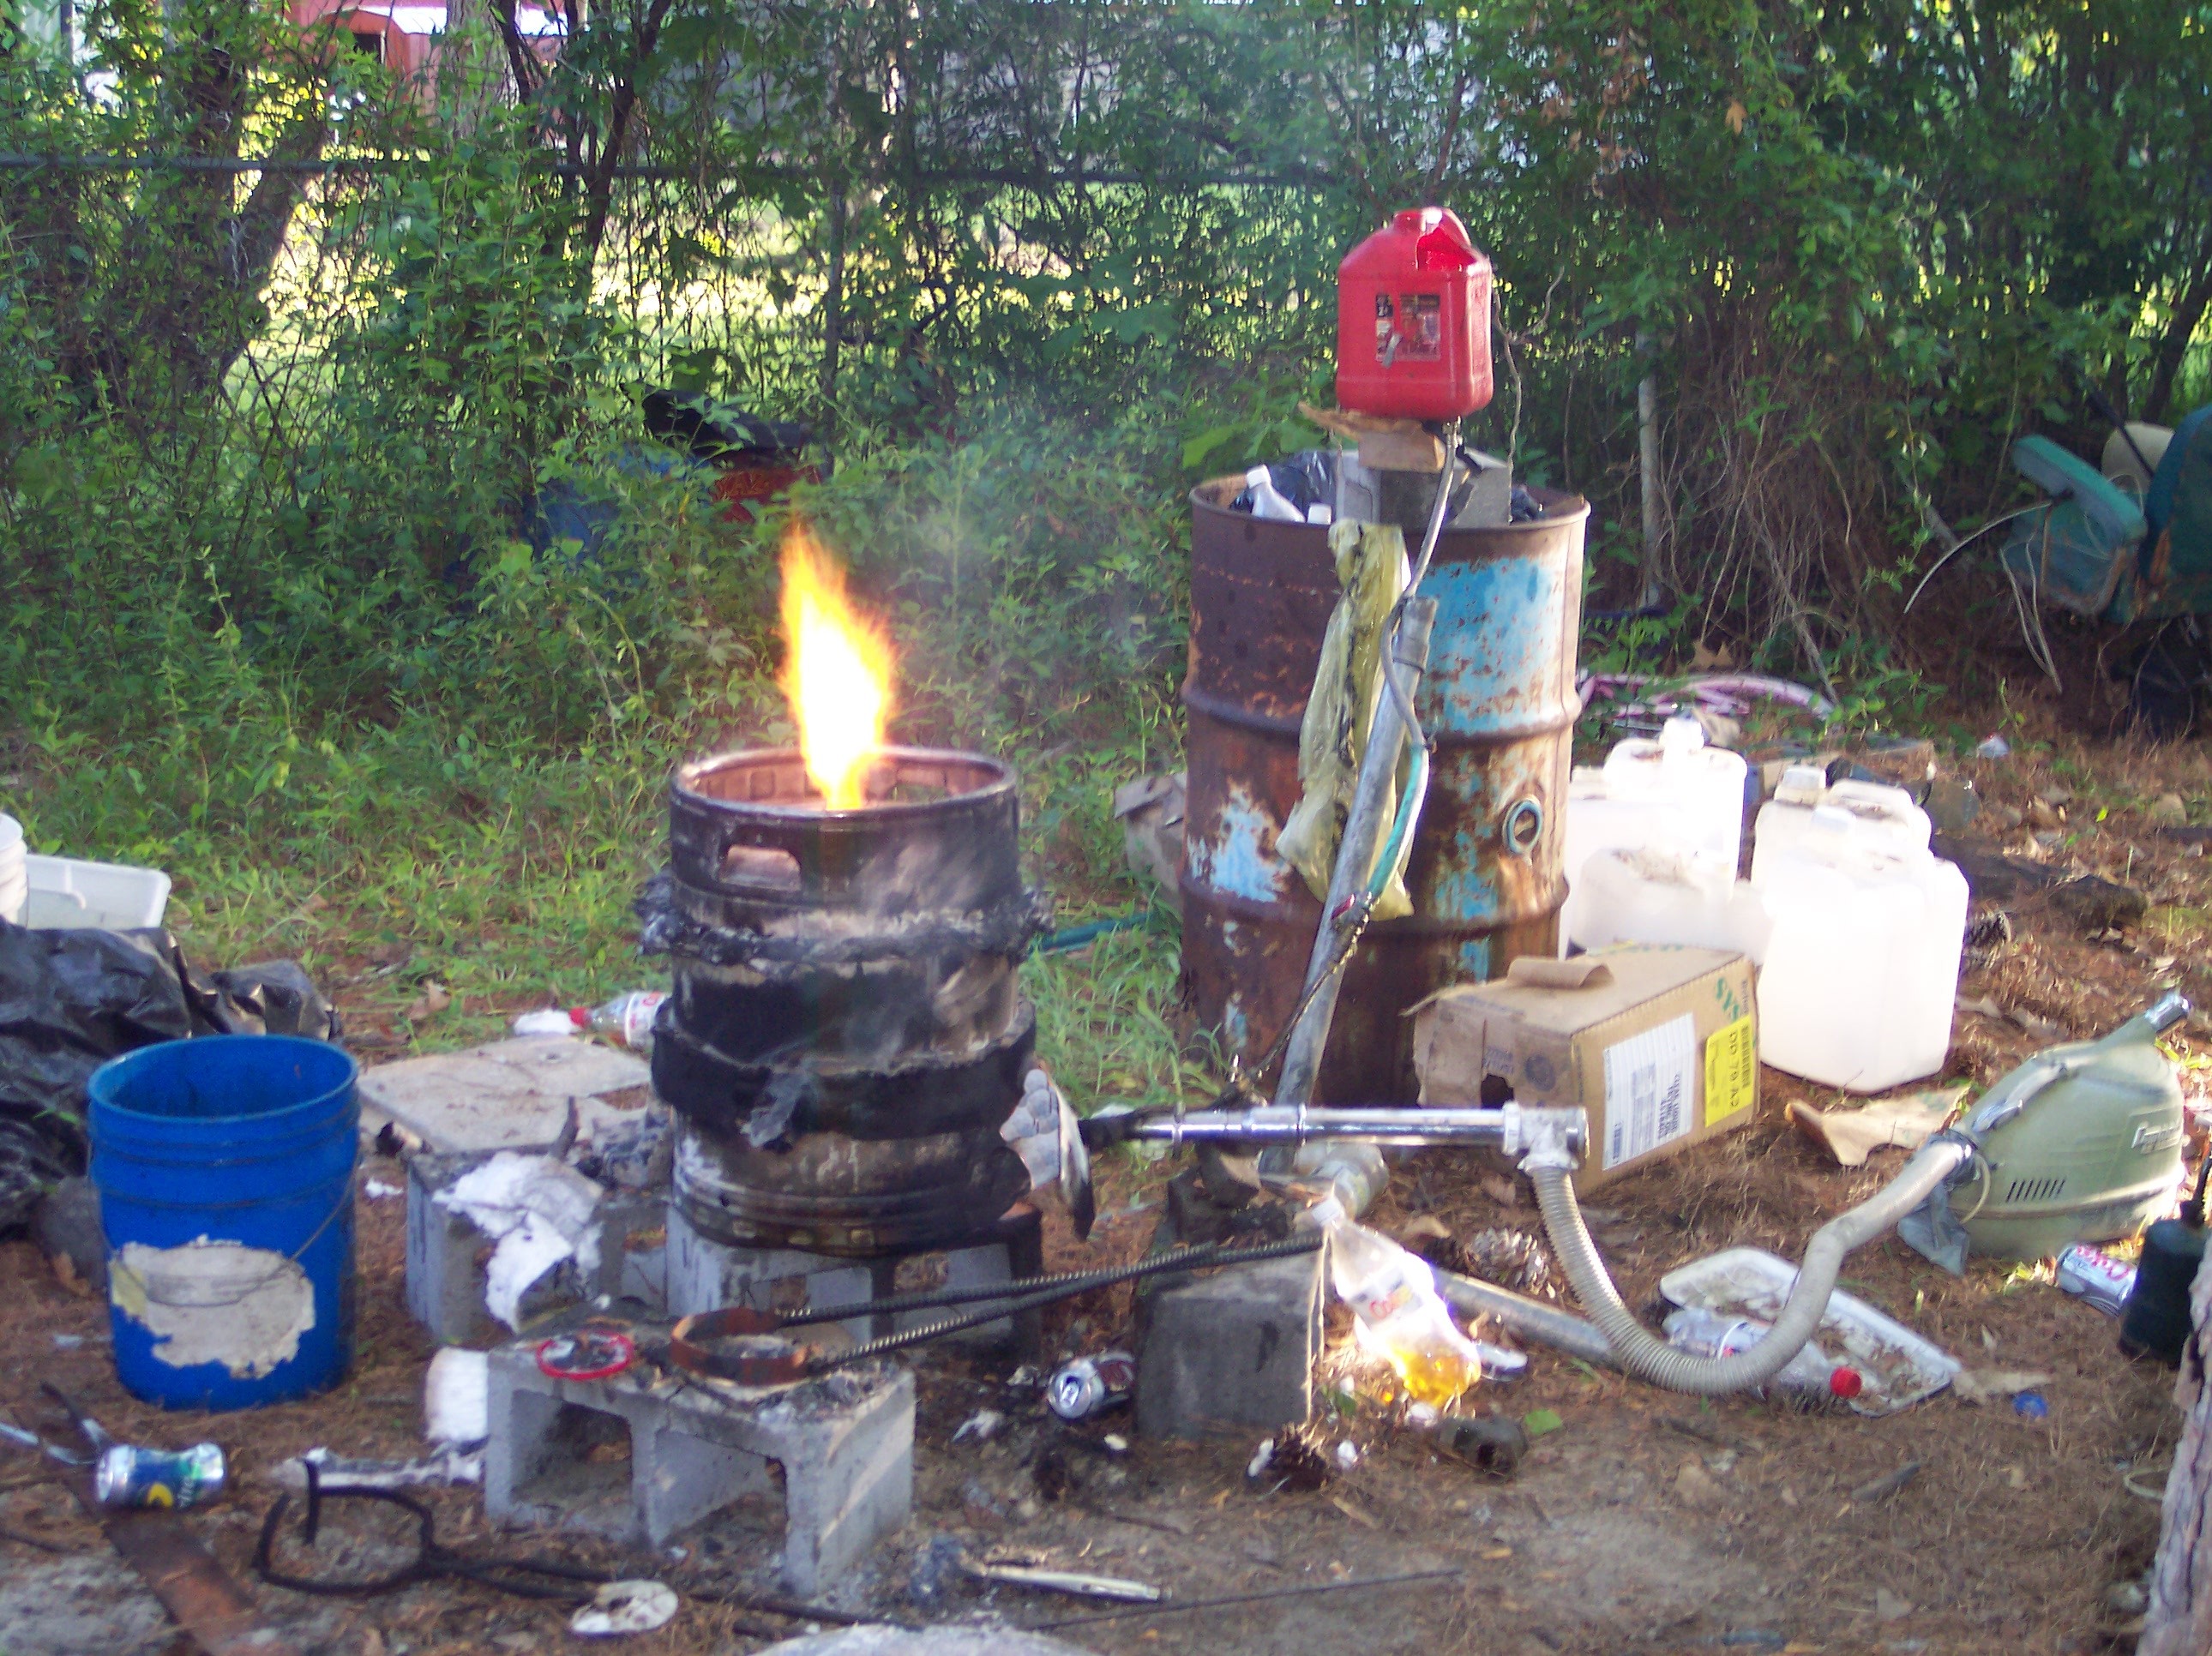
. This is an interesting one from Don, he contacted me after buying my book for a little help converting his Gingery charcoal furnace to my waste oil system, with a 6" bore it is the smallest furnace so far to be converted to The Artful Bodger's system.
Really it is perhaps a little too small, certainly to achieve the full temp. my furnace is capable of reaching.
I made a few suggestions for reducing the size of the oil burning system which Don has carried out and now he has a waste oil furnace!!
.
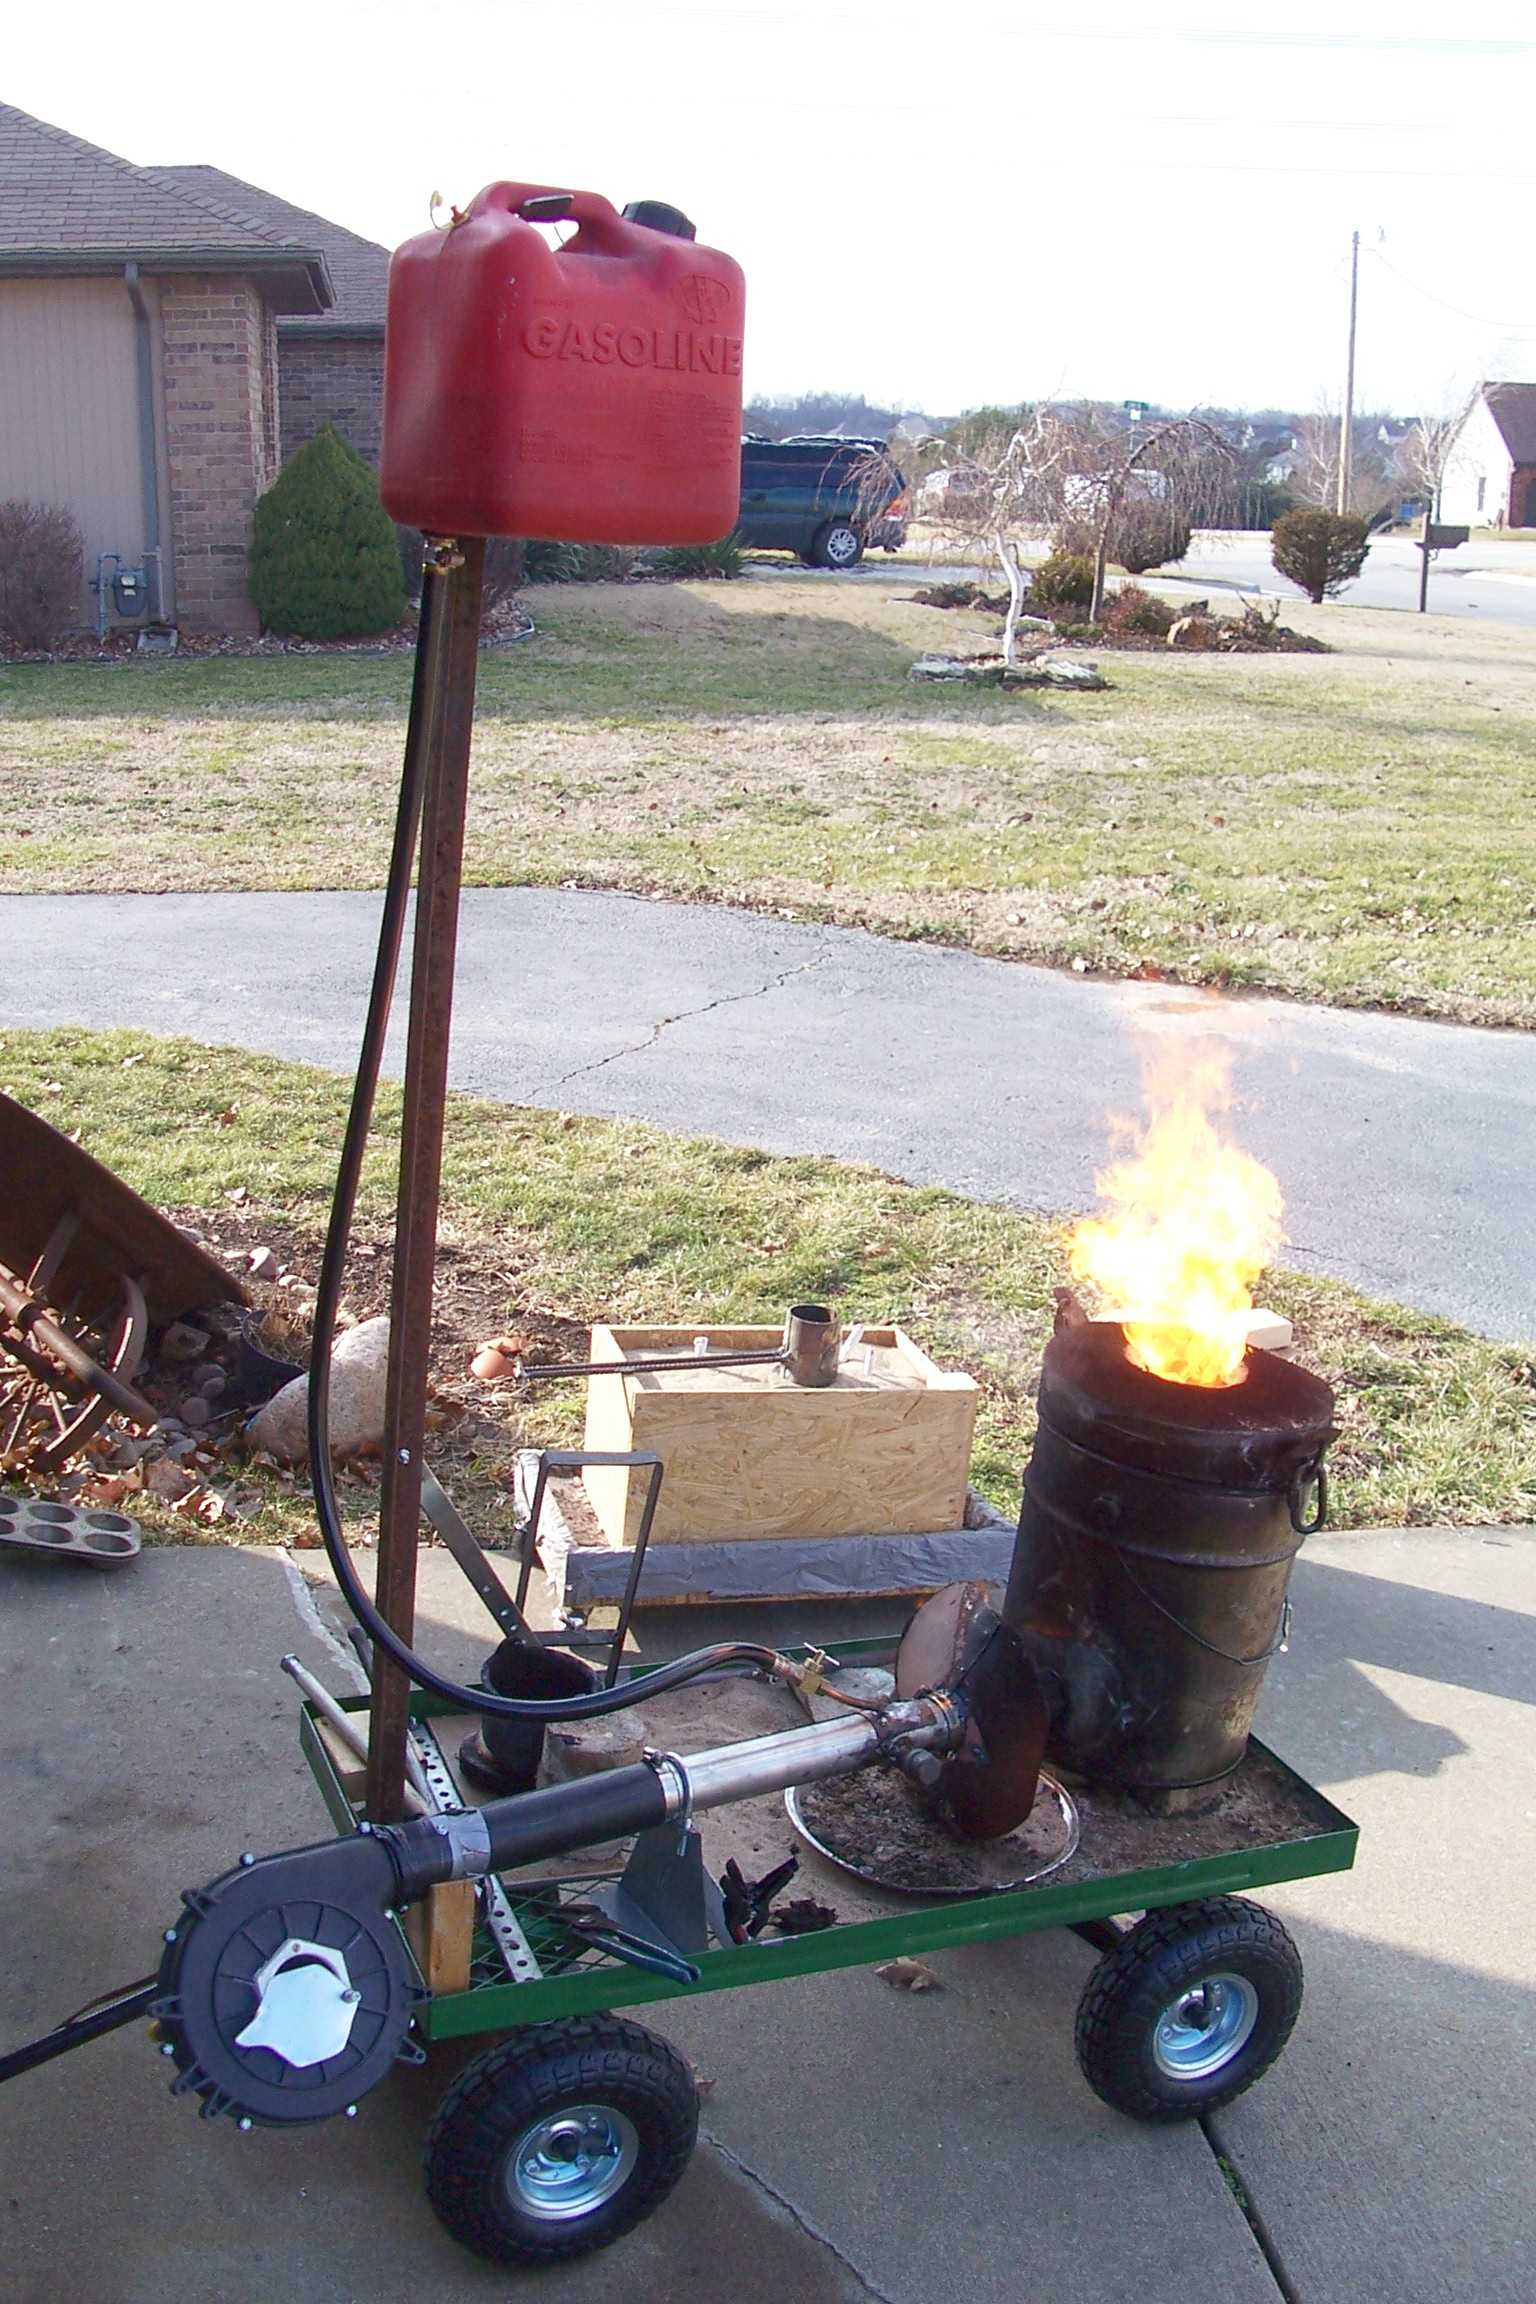
.
This picture shows a little more air is needed as the flame is a bit wavery, also the dip in the oil pipe will create an air lock, something which needs to be avoided.
However, the Gingery charcoal furnace has got to be about the simplest furnace construction there is, and here's one running on free waste oil, and that's a lot cheaper than even charcoal!!
I felt this was one that might be of interest to others, although I recomend something more along the lines of the 10" bore of mine, well..............
.
.
**************
.
.
.
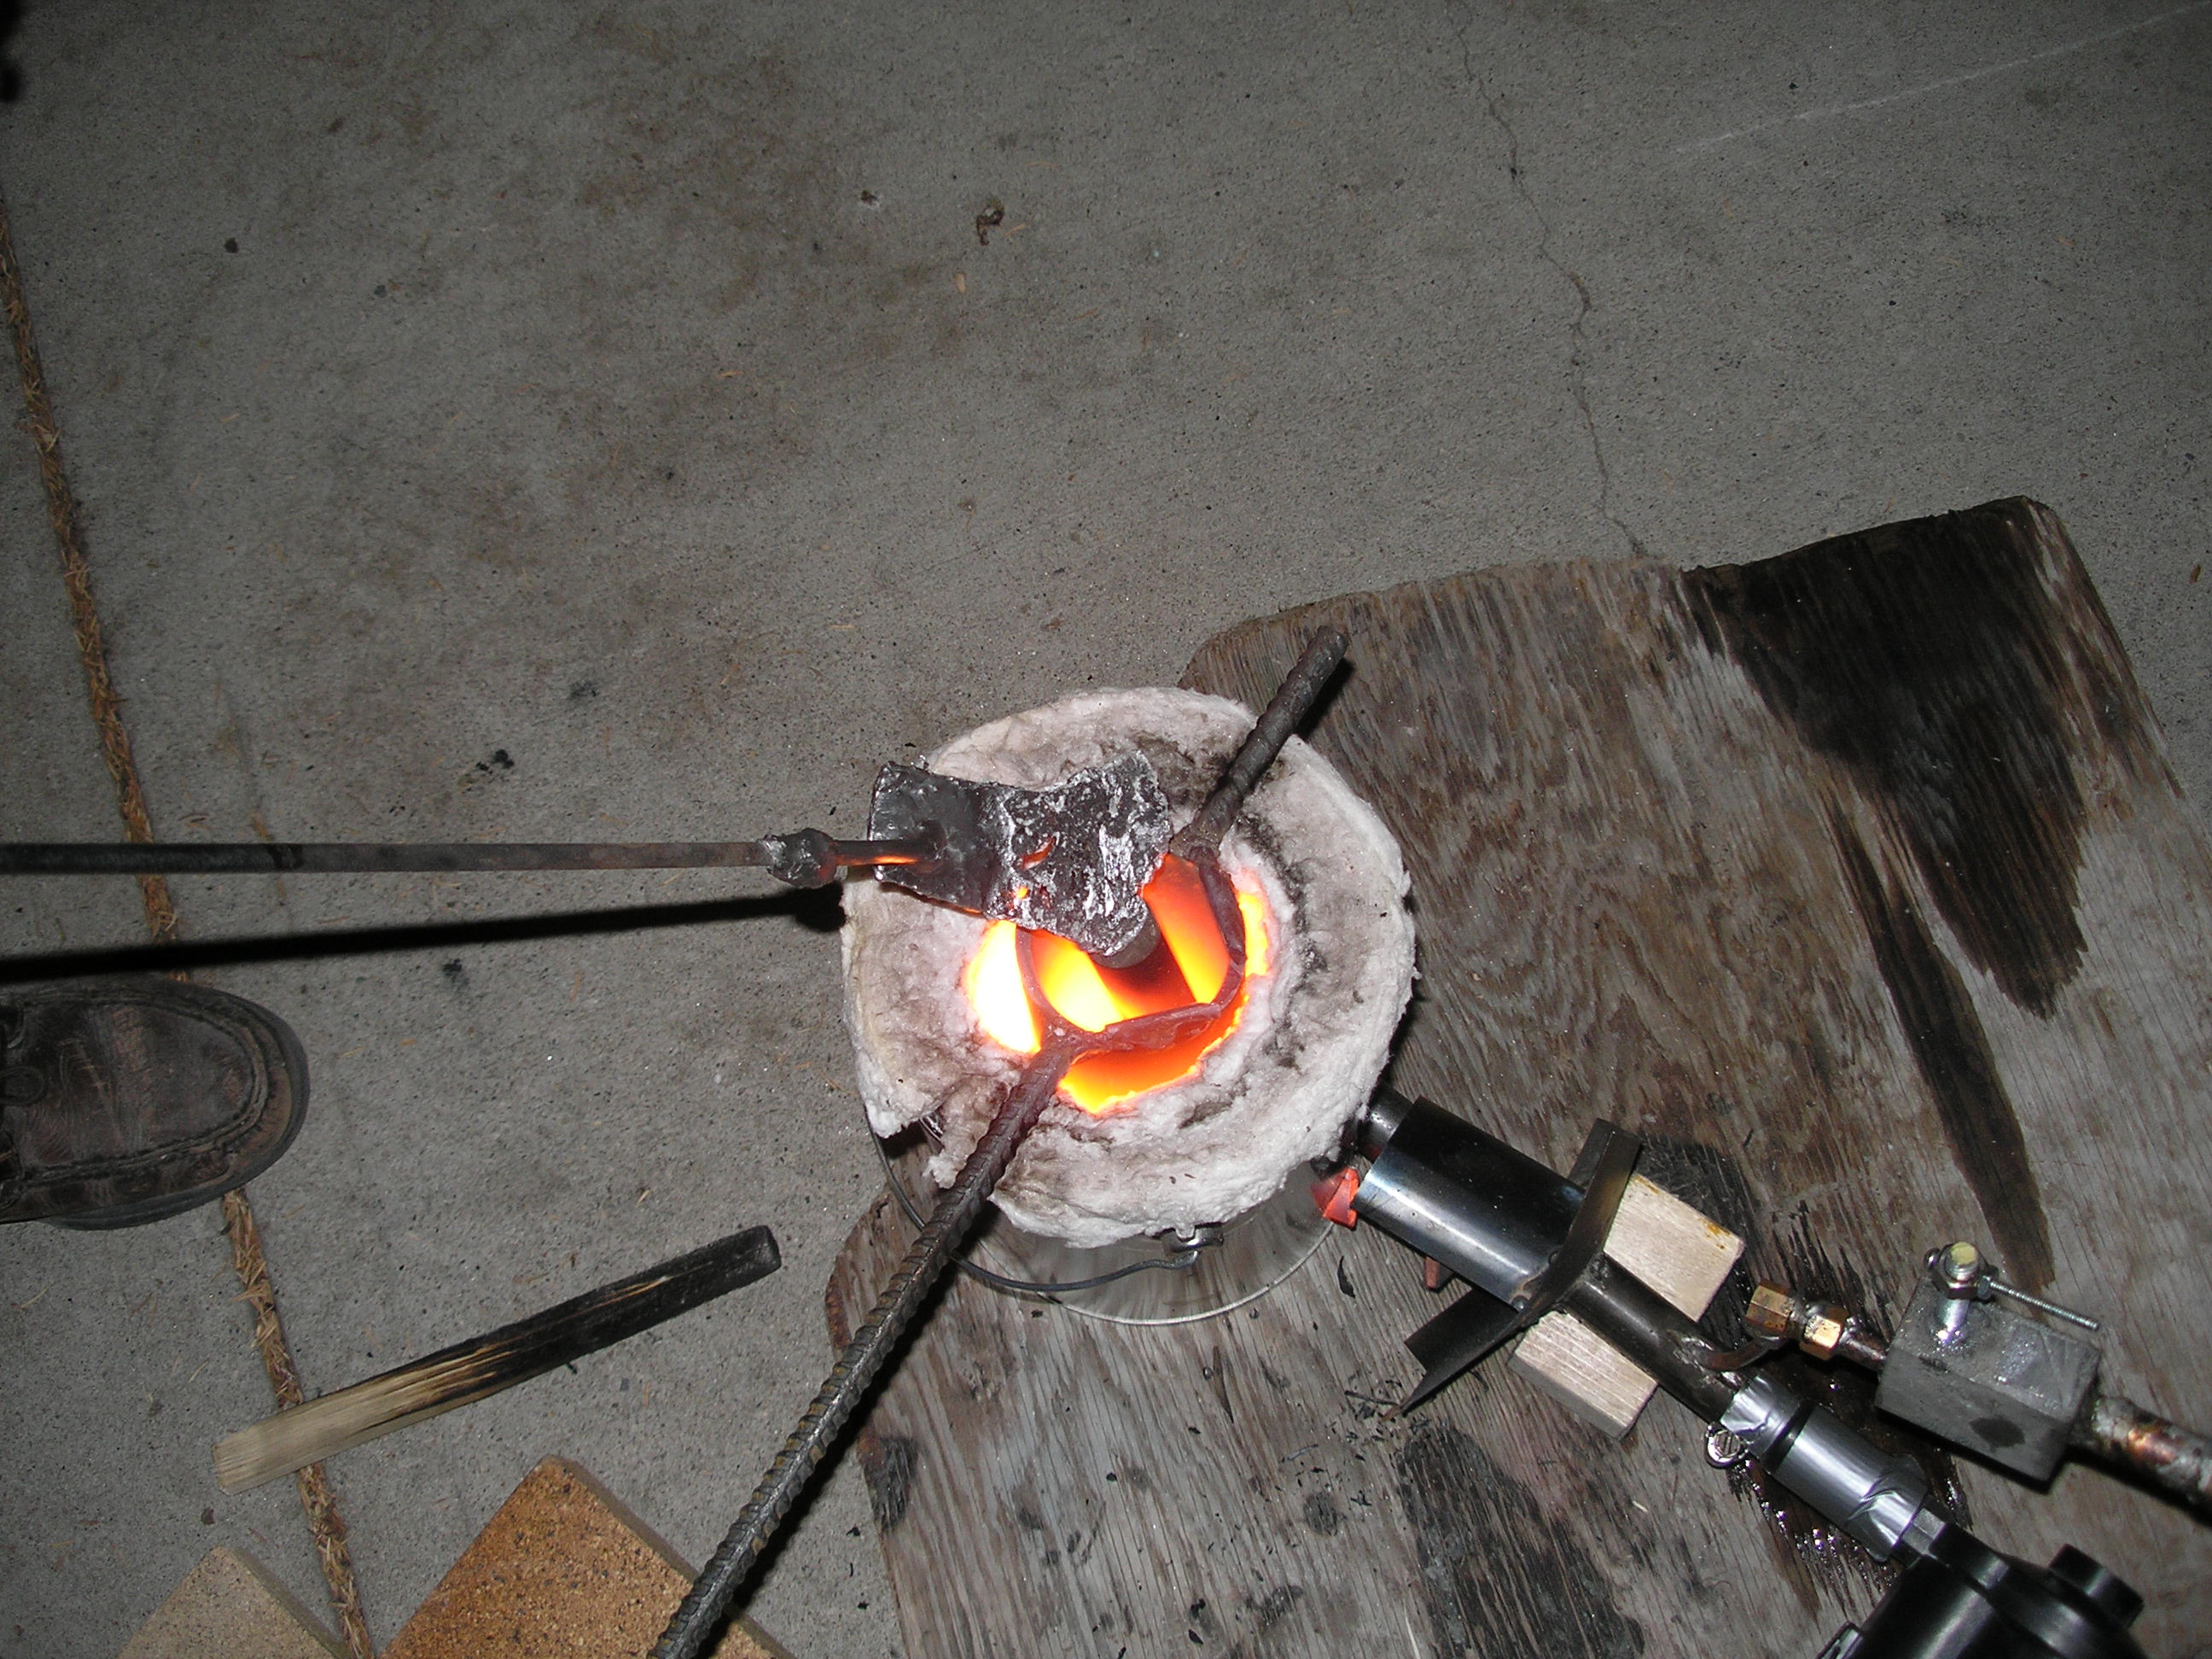
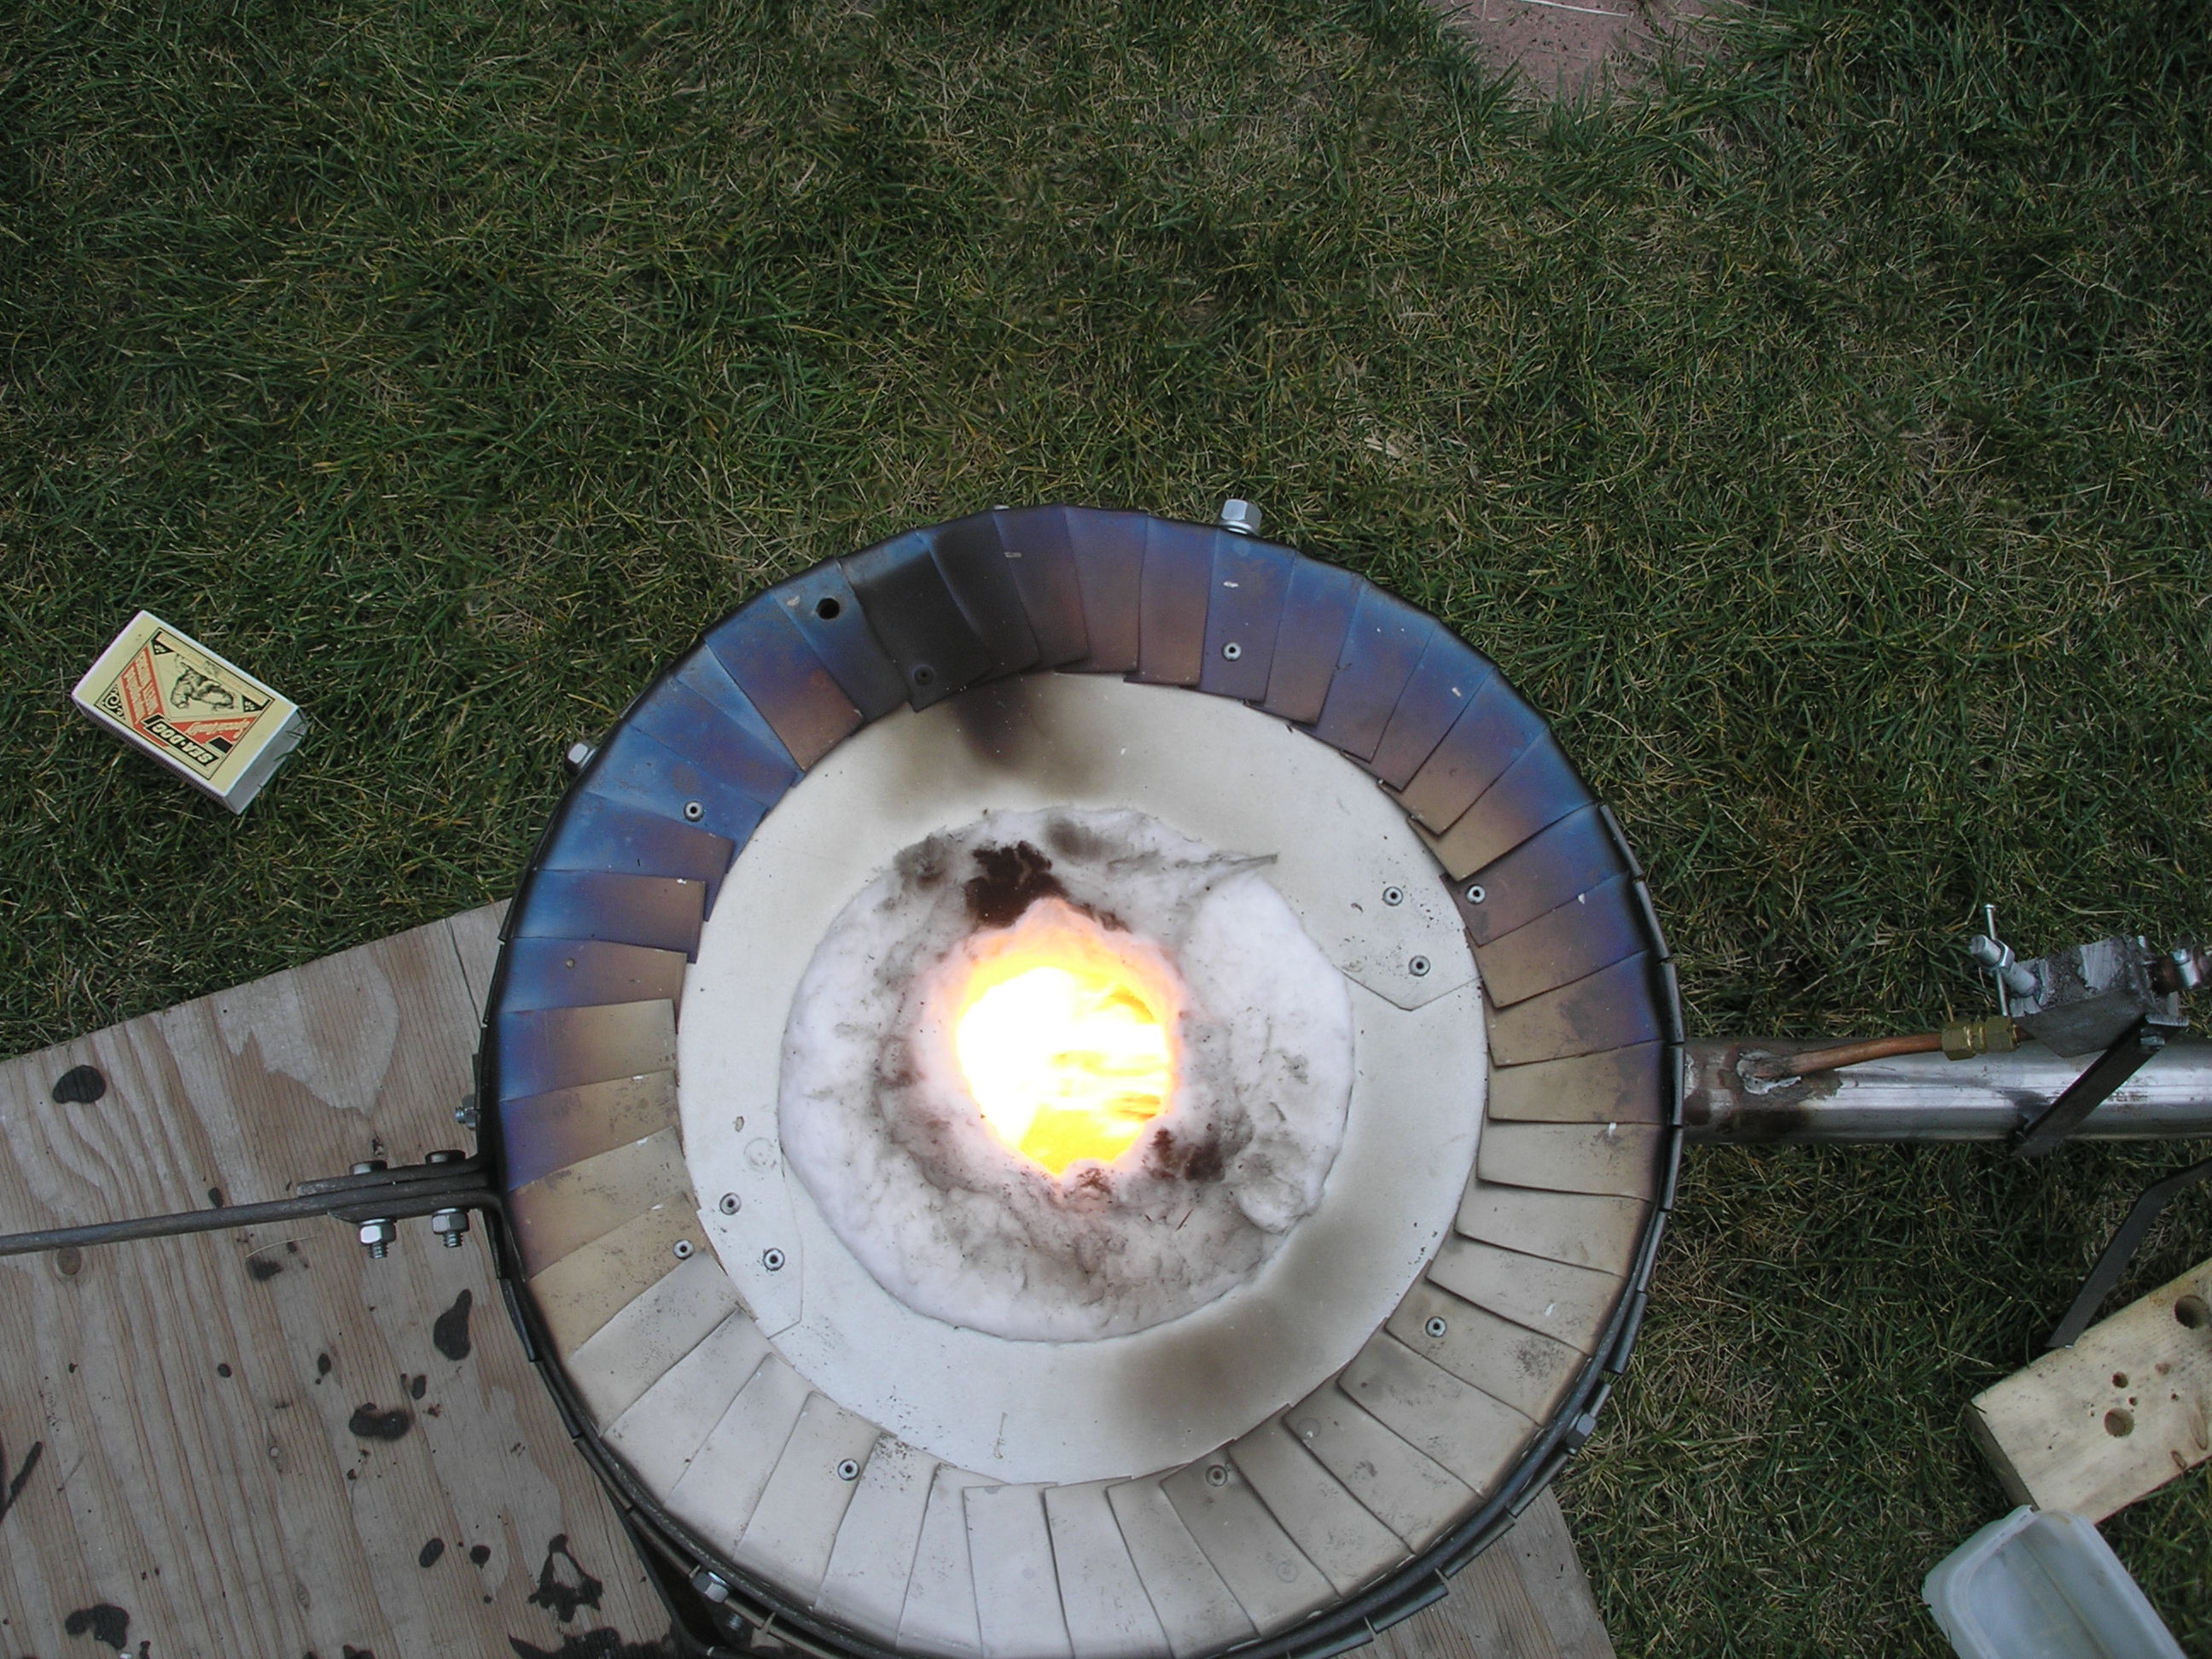
Dale's furnace
.
.
.
.
This is Dale's smaller furnace described in his second email.
.
Dale finished his furnace some time ago but as I'm still waiting for some pictures from him I hadn't added him here yet. However after recieving another email from him, I decided it was about time to get something down here and I will add some more pictures as they arrive.
I'm just going to copy two emails fron Dale here, all very interesting stuff! Don't forget to click on the link, it's certainly worth a look.
.
.
First email;
Colin
I have just finished building my oil-burning furnace and it works great! I have only fired it up twice so far but it lights easily and burns beautifully. In the first test we hit 2,700 F. before the pyrometer went off the scale!
I fabricated my own furnace container out of sheet metal and am trying ceramic fiber insulation as the liner (2"thickness). The insulation was actually cheaper than refractory but we'll see. Using the fiber means I can heat up to temp. very fast and the whole furnace and lid are very light (the lid is about 2 pounds and I attached a handle to the furnace and can carry it around easily). I haven't made the furnace a cupola because the floor of the furnace is fiber and I don't think the molten metal would flow well like in a refractory-bottomed furnace.
I next want to melt some stainless steel (2,2550 F.) and would like to use a crucible in the furnace. The problem is finding a crucible that can handle that kind of temp. melting ferrous metal...............................
.
This is the second email;
Colin,
I
did
eventually
get
the
right
crucible
and
melt
the
stainless
steel.
The
surface
of
the
melted
steel
seemed
to
oxidize
and
harden
although
the
metal
was
fluid
underneath.
Very
high
temperatures
and
burned
lots
of
oil.
I
think
I’ll
stick
to
cast
iron
and
aluminum.
I
have
included
a
couple
of
photos
of
a
one
gallon
furnace
I
made
using
your
oil
burner
design.
I
thought
you
might
get
a
kick
out
of
the
miniaturization.
I
melted
aluminum
quite
easily
with
it.
The
lining
is
the
ceramic
fiber
insulation
I
mentioned
last
time.
The
blower
is
a
battery
operated
air
pump
my
son
found
at
a
garage
sale.
I
don’t
really
have
a
good
photo
of
the
large
furnace
at
work
but
I
have
attached
one
that
shows
from
the
top
how
white-hot
it
can
get.
The
reason
I
made
this
small
furnace
is
related
to
a
personal
project
I
am
doing
on
a
remote
island
in
the
South
Pacific.
I
began
looking
into
small
scale
casting
just
about
two
years
ago
in
order
to
cast
a
coconut
oil
press
I
had
invented.
Being
able
to
produce
oil
at
the
village
level
will
lead
to
many
benefits.
Currently
the
villagers
export
dried
coconut
to
be
processed
in
the
Philippines
instead
of
processing
it
themselves.
Small
scale
casting
will
allow
them
to
make
the
press
and
replacement
parts
locally.
You
can
find
out
more
about
the
project
by
going
to www.VillagesFirst.com.
If
you
follow
the
link
in
the
October
2007
Current
Update
it
will
lead
you
to
a
video
of
some
natives
using
this
one
gallon
furnace
with
coconut
oil
to
cast
aluminum
(they
cast
the
letter
A
for
Ambae
the
name
of
their
island).
The
plan
isn’t
for
them
to
use
a
one
gallon
furnace
but
I
made
it
small
as
a
demonstration
furnace
so
I
could
take
it
down
in
my
suitcase.
I
was
hoping
to
add
a
link
to
your
site
near
the
casting
video
on
my
Villages
First
site
and
add
something
like
“oil
burner
design
by
The
Artful
Bodger”
and
your
link.
Would
that
be
okay
with
you?
Regards - Dale
.
.
*******************
.
Mike's furnace
.
Mike Prior is now off and running with his furnace, as you can see from his pictures he's adapted things to suit available materials.
This is what I try to get over in the book, keep the main principles the same as mine, but make whatever changes are needed to suit your available materials!
This is an email from Mike;
.
Hi Colin
Photos attached
The fan was won on eBay for £10, the fuel tank came from a skip, holds 5 gallons and has a fuel gauge!
The unit in the photo next to the tank is a speed controller. The electronics cost £20, the box was an old electronic switch unit and the heat sink on top came from an old computer. Everything else is old junk and scrap steel from the junk yard.
I think I'll name her "Red Rocket"! (I wonder why?)
P.S. I must have done a good job on the insulation, after 6 burns the paint is still holding fast.
Regards Mike prior
.
.
.
.
Mike shows here that all you need is out there at the right price if you take the time to look!
.
.
.
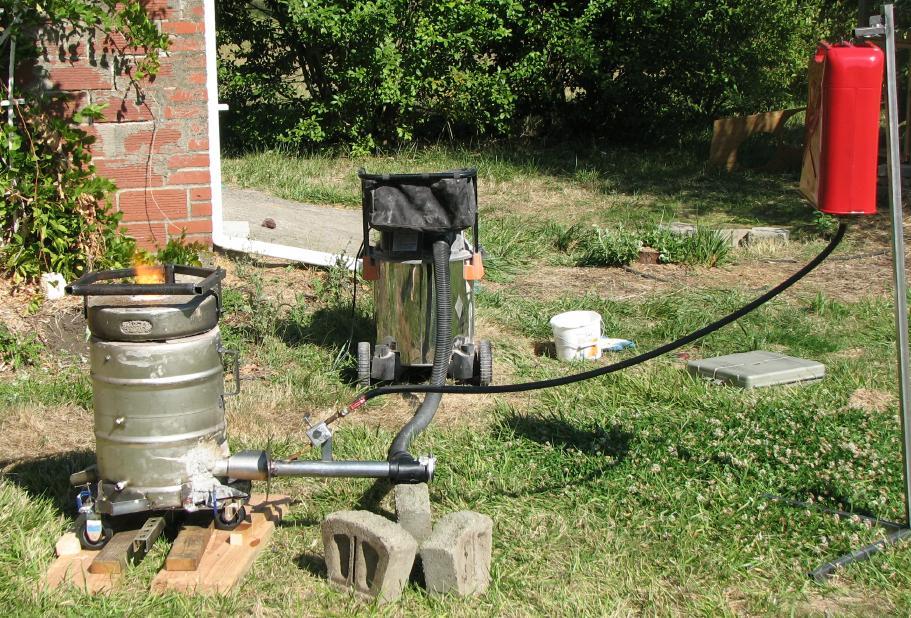
Bob Hunt's furnace
Bob is up and running with a great looking furnace, he decided to add a Gingery style lifting body to my design and he's very happy with the results! He's been busy casting loco parts from iron and doing a great job with them!
.

![]()
.
As you can see Bob's well under way here, we've exchanged a few emails on iron casting and the amount of slag created and part of what he's said is;
"I tried a charcoal cover today and it did improve losses on the first heat. You were right about me using too lean a mixture, I re-read your notes on operation and realised I was letting the flame disappear into the furnace at melting time.
I did three heats today and cast 3 6lb. loco wheels with acceptable slag losses. You were quite right about needing to play around with the settings and get used to the way the furnace behaves. I was really happy with the way things went today. That burner of yours can really put out the heat!
Happy casting
Bob
.
.
.
.
**********************
.
.
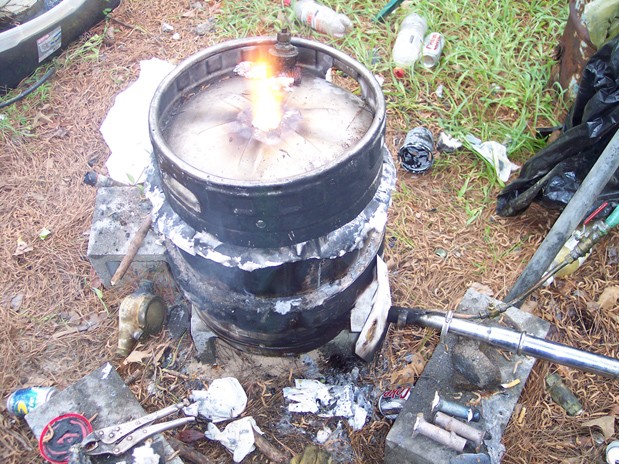
Jonathon Liddle's furnace
Jonathon
has
joined
us
metal
casters
who
cast
for
free!
He says;
Hi Colin
I've had the furnace running for a while now and am very pleased with it, I've melted brass with no problems at all. I made the body out of an oil drum cut down, pulled in and welded up. The bore is the same as yours, with an inch or so more refractory wall. The blower is a fan from a boiler with a biscuit tin housing - a piece of wood over the hole metres the air.
I've no doubt it'll melt iron as it just gets hotter and hotter! The key to it running well though is to get it going well with wood and don't give it too much air for a fair while.
I'd never have come up with this on my own. Thanks for letting me in on a great design.
All the best Jon.
. *************************
.
Have finished building the furnace and
burner/blower exactly as per your book and ran it on
oil yesterday for the first time !
Blimey, this thing puts out some heat !
I have to say that I don't get much 'free'
time as I'm always busy, so I just don't get any
time to experiment and adjust things and see what
happens, so your book has been a godsend !
I reckon it would have taken me years of wasted time
and money to get to the stage where the damn thing
would work properly . . . .
So, a heartfelt thanks for your book and your
subsequent advice and guidance.
I am having problems casting a proper oil
control valve though as I keep getting 'bubbles' in
the ali.
I have investigated this and on subsequent
attempts have avoided 'stewing' the ali, I have the
vents in place and have poured ingots of ali and
then remelted them to reduce the inclusion of
hydrogen gas.
My last attempt last night was better, but the
15mm pipe was still 'connected' to the outside of
the casting via a void in the metal - any ideas ?
Have attached a photo or two of the furnace -
it looks remarkably like yours, but in the spirit of
the book, I have substituted what I had on the shelf
where suitable to do so.
Please don't hesitate to quote me on your
website if you want to !
Many thanks and best regards,
Rick Burtonshaw
Hi Colin,
I sorted the oil control valve in the end and
it's been all go here and I have now poured molten
iron properly for the first time after using a
charcoal 'lid' to keep slag production to a
minimum.
Really happy with the results - so thanks for your
kind advice.
A couple of photos for you - I made a pouring shank after one of my
'aluminised foundry gloves' caught fire during a pour on Monday.
Have been playing around with 'lost foam' patterns using polystyrene and
it's working really well - smokes a bit but I managed to cast a new
tailstock for my wood lathe with a steel pipe embedded to take the
adjusting wheel and attachments - happy days !
Cheers
Rick
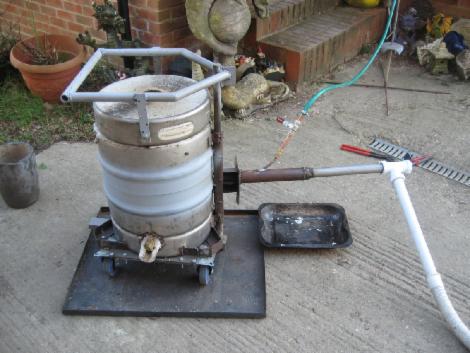
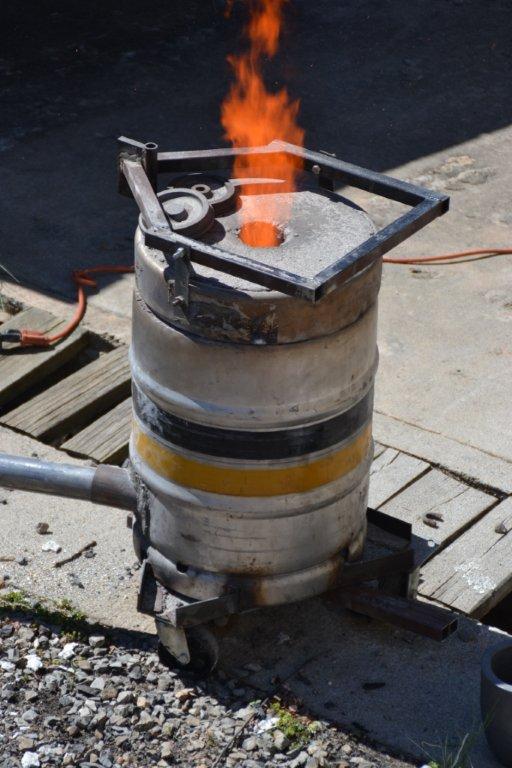
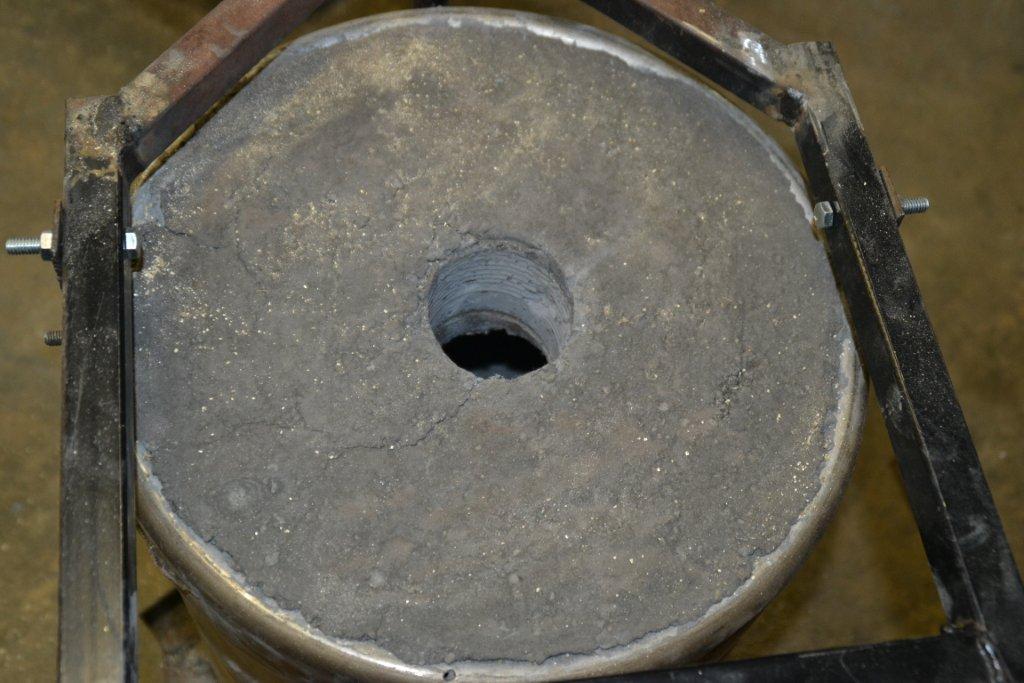
He's getting on pretty well as these pictures show! He says;
Hello Colin
I bought your waste oil furnace book from you in December 2007. I got
hold of a suitable beer barrel within a couple of weeks but some of the
other materials took me longer to acquire. I finally got the furnace
finished, together with all of the other paraphernalia required to start
casting, around the middle of last year. The first aluminium melt was
in June (2011) and by the end of the year I had completed several
successful aluminium castings.
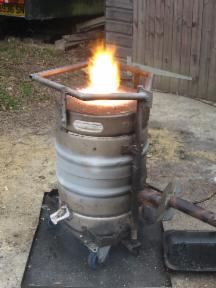
Earlier this year I turned my attention to to cast iron.
What a brilliant Diamond Jubilee weekend it turned out to be! The
weather improved on the Monday and to the sound of a local street party
in full swing I melted my first 10kg of scrap cast iron - at that point
I was celebrating too. The 10kg panned out as: three machine parts (4kg
including sprue); 5kg of ingots and 1kg of dross. After several years
on the construction and preparation what a fantastic feeling it was
shaking out the flask and seeing the newly completed iron castings.
I can only add to what others have said previously, that your furnace
most certainly works and that I am personally grateful that you took the
time to write up and publish your experiences on waste oil furnace design.
For the record my furnace is fundamentally built as per your book,
except that I did change the construction in a few areas to suit either
the materials I had to hand and/or my tools and inabilities to use them.
All of the metal work was made from recycled materials. The "fan" was
straight out of the book in that it is a neighbour's discarded vacuum
cleaner! The speed controller is a Variac (variable auto transformer)
that came from an industrial site clear out and which only needed a new
case to be made for it. In use the roar of the furnace is louder than
the fan, so I did not need to take the "Hoover in a box" approach.
I have a good source of waste engine oil that I am running it on. I
used an A12 crucible for the cast iron. The temperature gauge was a
3/8" diameter mild steel rod. Seems you need a new tip for every cast
iron melt!!
I have attached some photographs.
Thanks again
Best regards
John
**********************
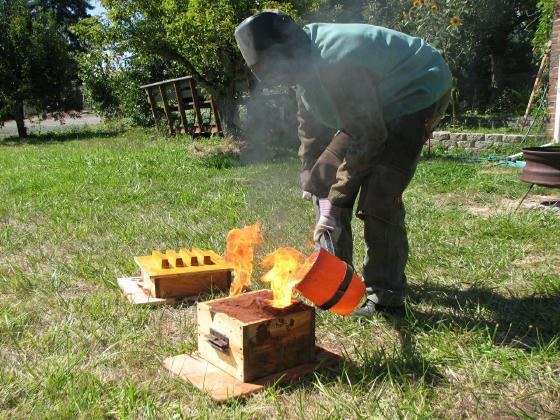
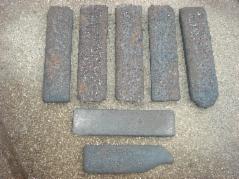
Charlie Pipes Furnace
Charlie's been on the go with his furnace for a while now, me being lazy again!
Charlie says;
Hey Colin
Furnace is continuing to run great and I am getting much more consistent results as my pattern making and molding skills grow. I am getting the parts I need for the locomotive and am actually putting it away soon to concentrate on machining out the frame.
Some pics. of his furnace and a couple of his castings.
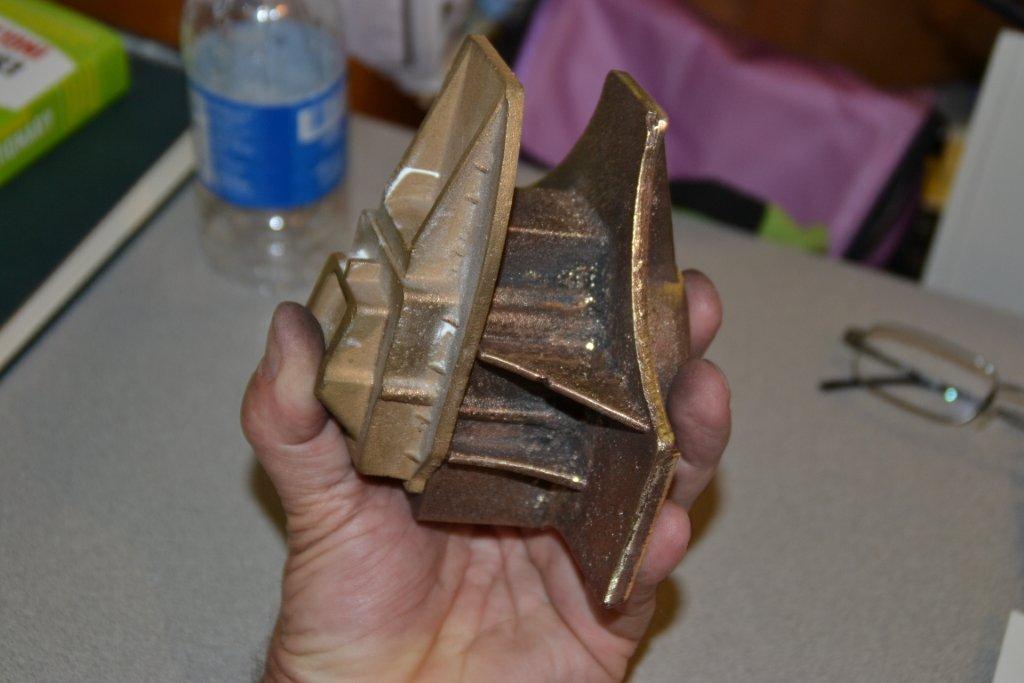
I'm hoping Charlie will keep me updated with this loco he's building, it will be nice if I can get some pictures of it here as it progresses.
*****************