The Baby Furnace
.
.
In my early days of furnace building I was experimenting with different homemade refractorys, in the end I did a full circle and ended up with the original recipe of my first furnace.
I tried making tiles of different "brews", but I found it very difficult to compare them, and to actually assess their capabilities as a lining material. To re-line a furnace every trial was too much trouble!
I was pondering this problem while taking the dog for a walk, when I passed a building skip. Now, I suffer from skip constipation, I can't pass a skip! So a rummage in this one was inevitable, and I came across half a dozen 5 ltr. paint tins.
Would it work to make small furnaces out of the different materials I wanted to test? Yes, and the baby furnace was born!
.
.
Click on the pictures for a larger view
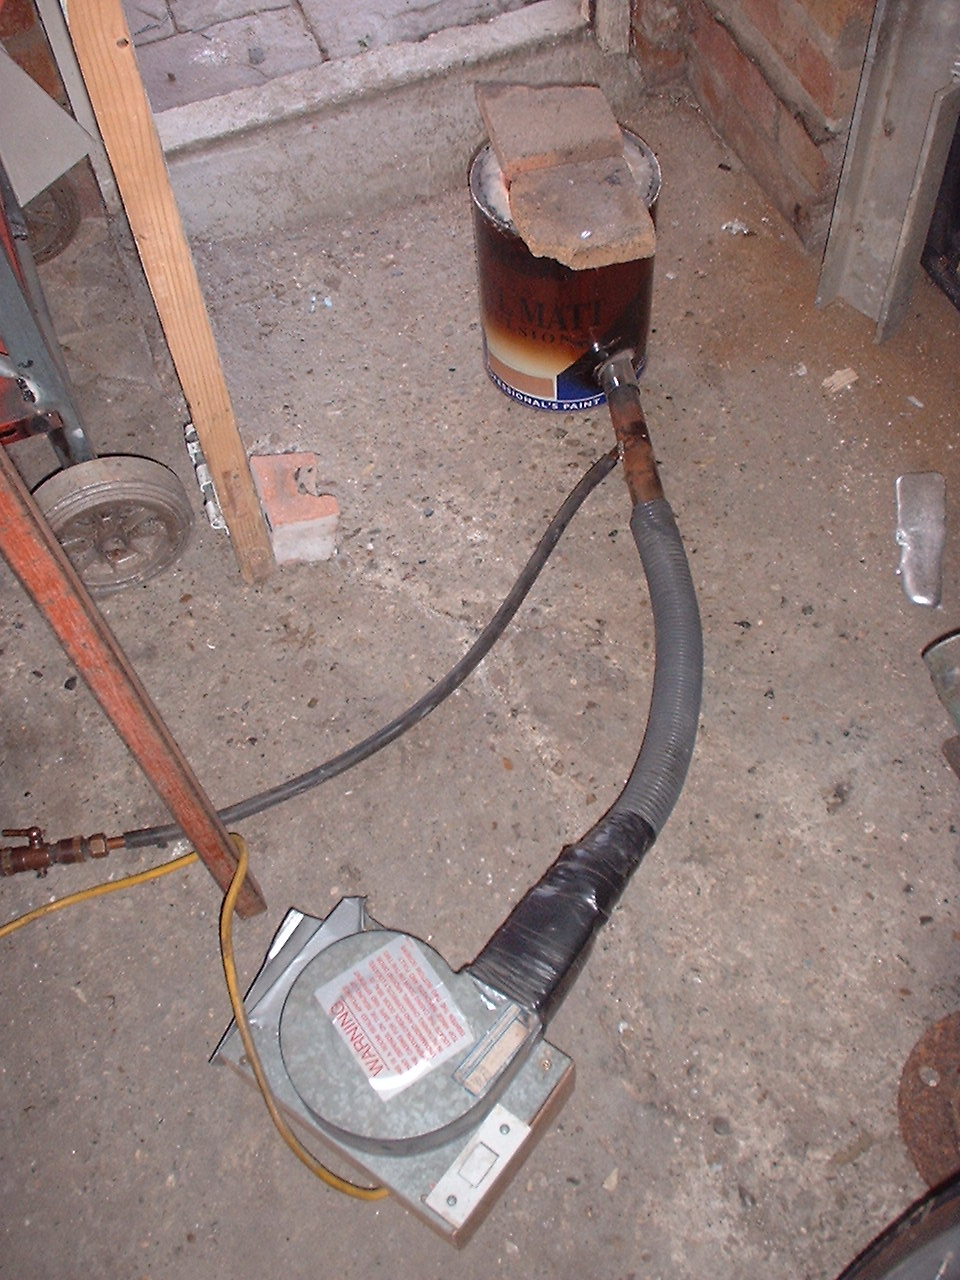
This is a central heating boiler fan, and the gas pipe is simply soldered into the air pipe at an angle, nothing more complicated than that. As long as the air is turned on first, then the gas turned on and lit it's fine! Remember to turn the gas off before the air. There are no jets involved for natural gas, just the 10 mm. pipe.
.
Now building a small furnace is nothing new, and I only intended these for testing purposes, however I found them very handy for melting smaller quantities.
I could melt a food can of alli with 6 charcoal briquets broken in half, but I did my testing using a simple W.V.O. rig, which could just about melt cast iron on a good day.
.
I now occasionally use one of these baby furnaces, burning natural gas for small quantities of metal, as I can use it inside my workshop. I must point out though, when I first ran a gas feed to the workshop and was playing with a baby furnace quite a lot, my gas bill went through the roof! More mutterings from the other half and talk of who got the dog etc.
So now I use it very sparingly, but for one small alli. or brass casting for a job I'm in the middle of doing, it's very handy!
.
I was going to describe the lining I settled on in this page, but have decided to combine it with some further information in the Some Thoughts page.
.
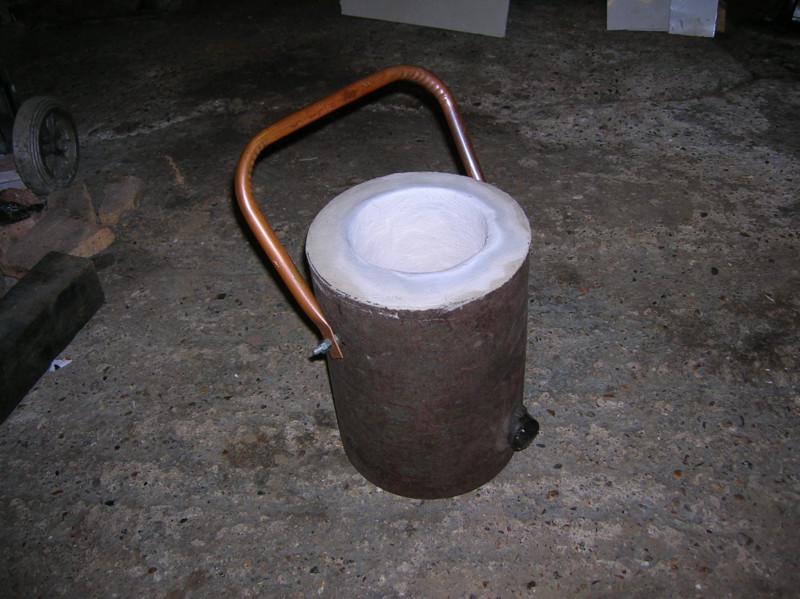
The furnace consists of a five ltr. paint tin with a four inch bore, although I've just made one for a friend using the steel roller off of an old lawnmower as the outer shell. (shown in some of the pictures)
The former for the bore is a piece of plastic waste pipe, and the refractory I normally use is the "home dug" blend. The air pipe is usually an old piece of exhaust pipe.
.
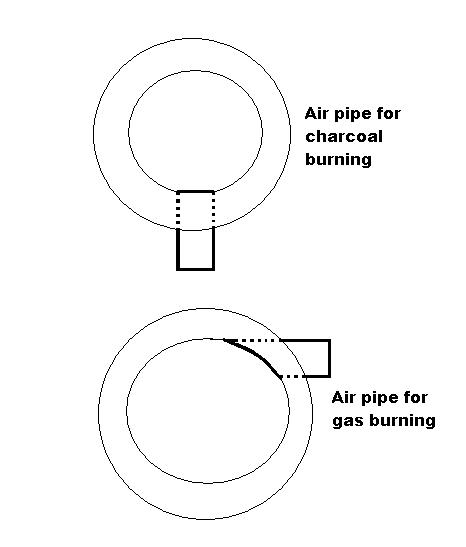
Make a hole in the tin so the bottom of the hole is about an inch higher than the bottom of the tin, this is for the air pipe. If you are going to burn charcoal, it's better to have the air pipe going straight towards the middle of the furnace. For gas burning, the air pipe should enter at a tangent to the inner circumfrence of the furnace.
.
Click on picture for a larger view
.
For both, use the gas style, although it will burn a little unevenly on solid fuel.
If you want to fit a handle, drill two 6mm. holes opposite each other through the tin, about an inch or so down from the top, and fit two 6mm. bolts through these holes from the inside and tighten a nut on each on the outside, use washers inside and out. You can then fit a handle over these bolts and put two more nuts each side to lock themselves together allowing the handle to swing.
.
A quite accurate job can be made of cutting the air pipe to the shape of the furnace interior for the gas style, by holding the pipe over the plastic pipe former and marking the general curve on the pipe with a felt tip pen. Visualise the curve as you draw it and remember this is shape must be cut at the top and bottom of the pipe.
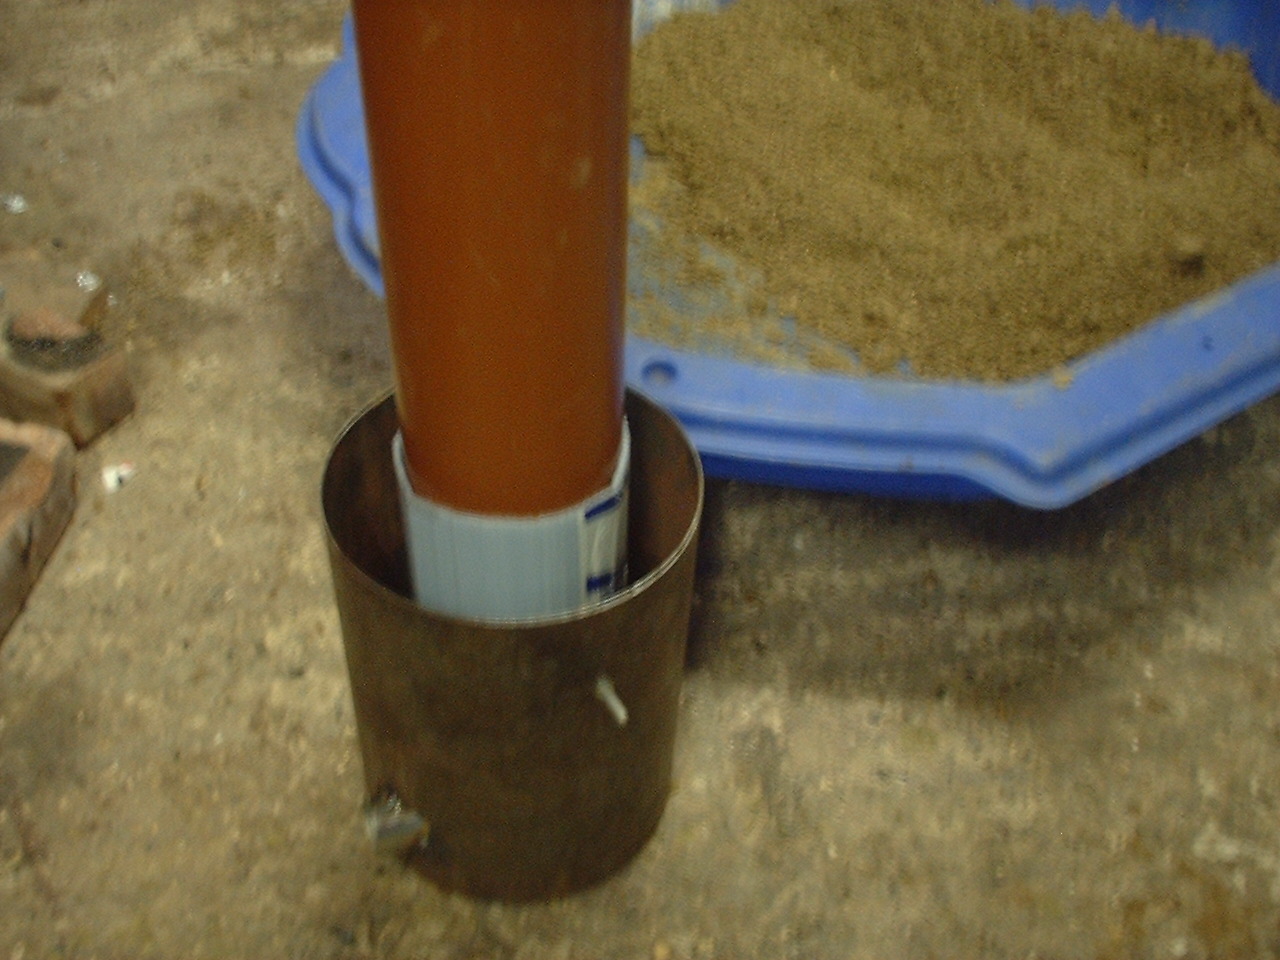
The four inch plastic pipe needs to be at least several inches taller than the paint pot, better if it's a foot or so taller to make it easier to get out. Drill a hole from one side out through the other side near the top of it so that it will be clear of the top of the tin when it is in place. This is to allow you to put a metal bar through the pipe to twist it around to loosen it for removal.
A thin plastic sheet wrapped around this pipe where the refractory will be, will allow the pipe to turn without being gripped by the clay. Wrap the sheet around the lower part of the pipe, then tape it to itself, not to the pipe. This will allow the pipe to be twisted out leaving the plastic sheet in place to be removed once the pipe is out.
.
Now put some of the refractory in the bottom of the tin, ram this in firmly with a piece of wood. If the bottom of the tin flexes, then put something under the tin that supports the bottom as you ram it.
When you've reached the bottom of the air pipe hole, put the plastic pipe and air pipe in place and ram refractory around it to hold them in position.
.
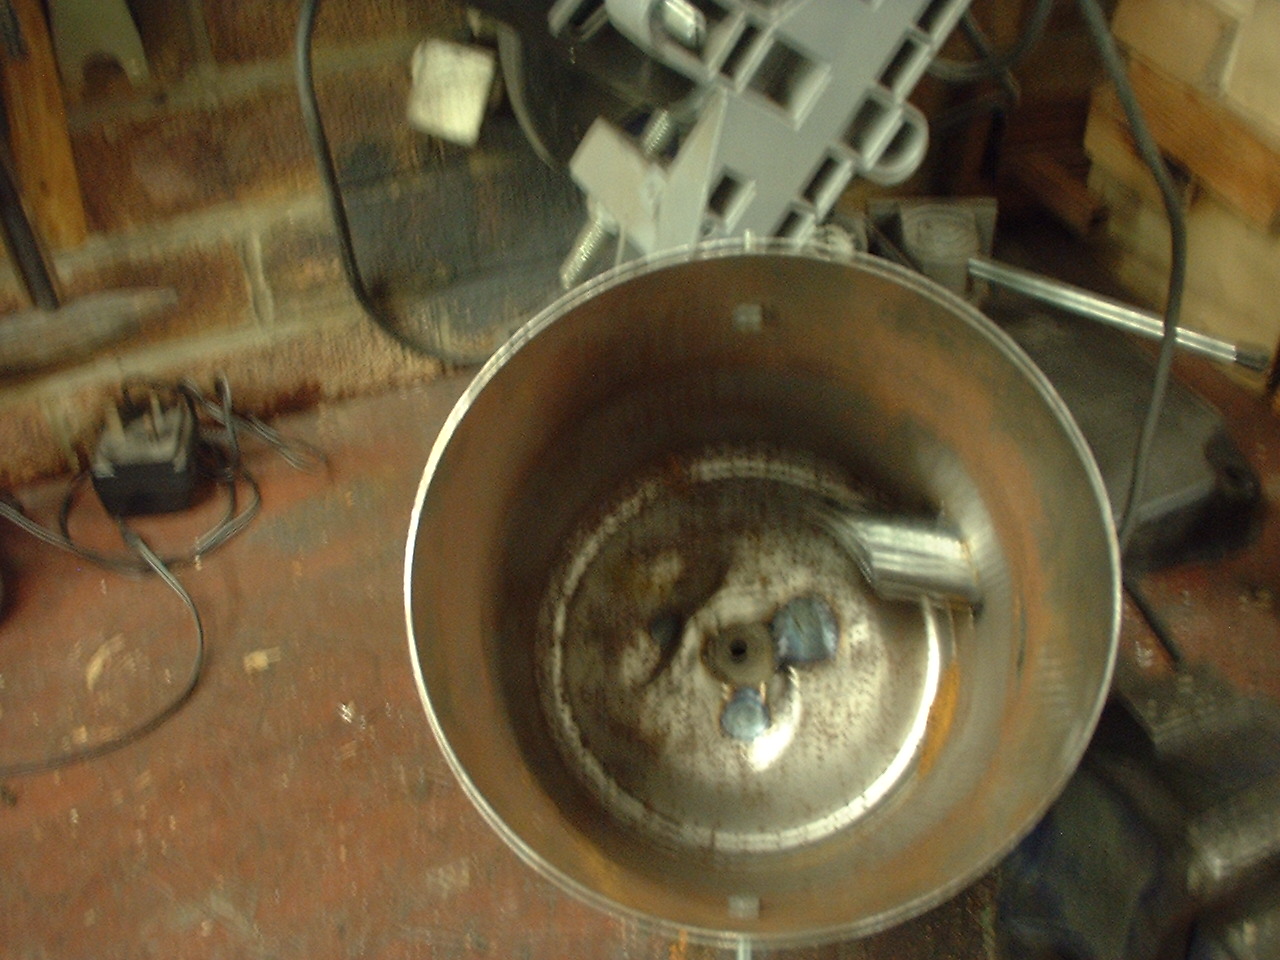
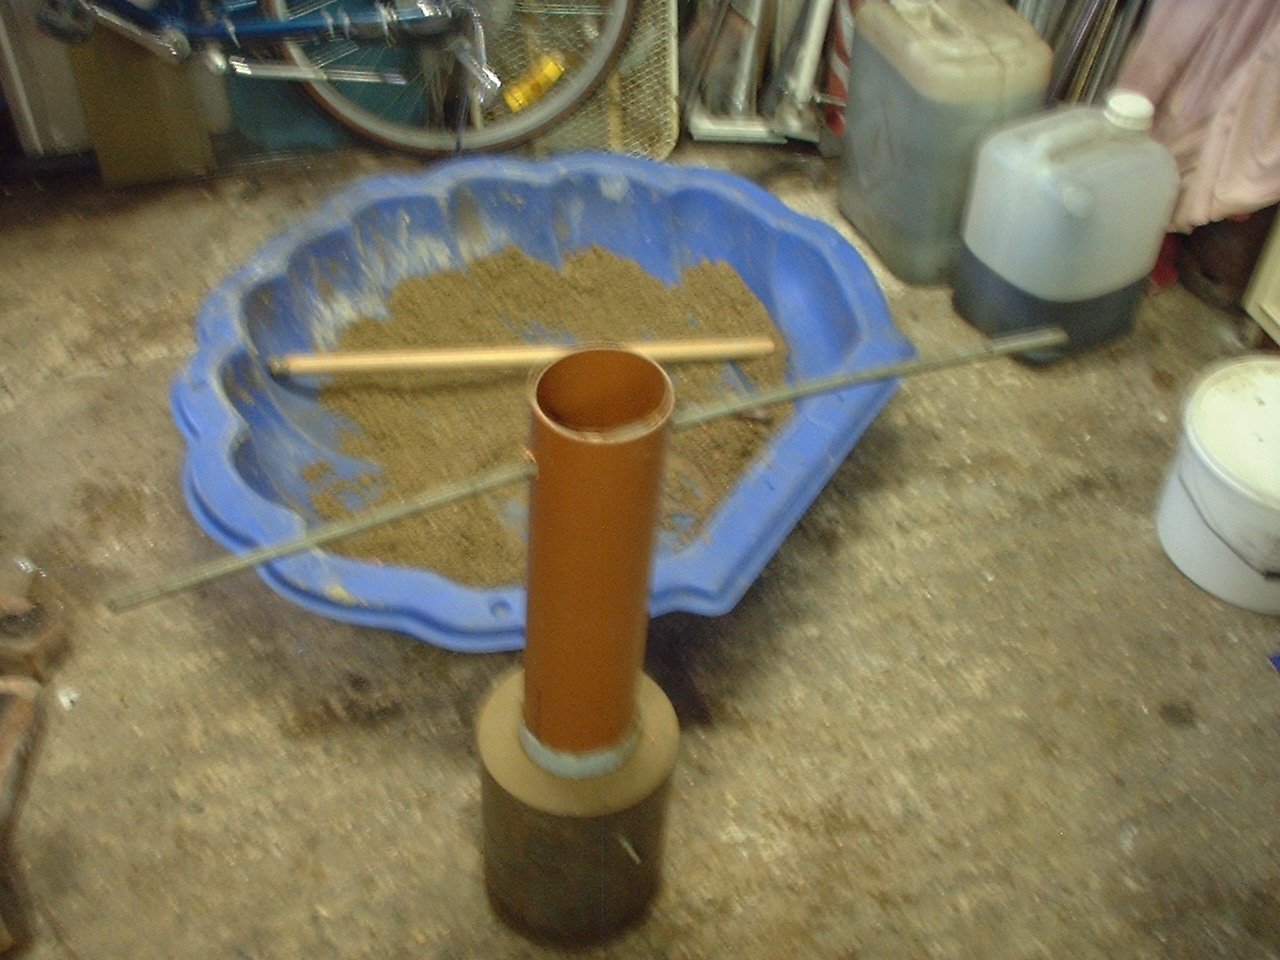
The air pipe cut to shape The former in place Ready to twist the pie out
Click for a larger view
For some reason these pictures are blurred, but they give the idea
.
Put around two inches of refractory in the furnace at a time and ram it in as firmly as possible, then another two inches until you reach the top, keep an eye on the plastic pipe to ensure it stays central. The harder you manage to ram the refractory in place, the less likely it is to shrink as it dries.
Smooth the top off with a scraper, then using the palm of your hand, knock the plastic pipe about to loosen it in the clay, I try to hold the tin between my feet to do this. Then place a metal bar through the holes and firmly twist the plastic pipe about drawing it upwards at the same time until it's out.
Remove the plastic sheet and if neccessary, fill in any repairs with some more refractory mix, the back of a spoon is handy to smooth any marks out.
.
This furnace is small enough to dry out in a domestic oven, a very low heat for a couple of hours, then turn it right up for another couple of hours.
Alternatively, light it up keeping the heat as low as you can to dry it out, then get it as hot as you can for as long as you can stand! This can be with charcoal, using a hairdrier or paint stripper as a blower, or some kind of gas burner.
.
Important, Please Note
Although I describe the gas burner I use earlier in the page, this is NOT a recomendation, I have NO qualifications to suggest any form of gas burner, these are 100% your responsibility!
.
I describe the problems with this type of refractory in the some thoughts page, so I won't do so here. Although it's not necessary, I thinned down some fire cement (look in diy/hardware stores) to a thick paste, and painted it all over the dried clay (I dampened the clay down a little first to help the fire cement to stick).
This gives a hard coating to make it a little tougher, I didn't often do this to my clay refractory furnaces, but since this was for someone else I decided I would on this one. I had to re-dry it in the oven after leaving it for a couple of days to air dry.
Usually I would start to make this type of furnace in the morning, and be melting metal in it in the afternoon.
.
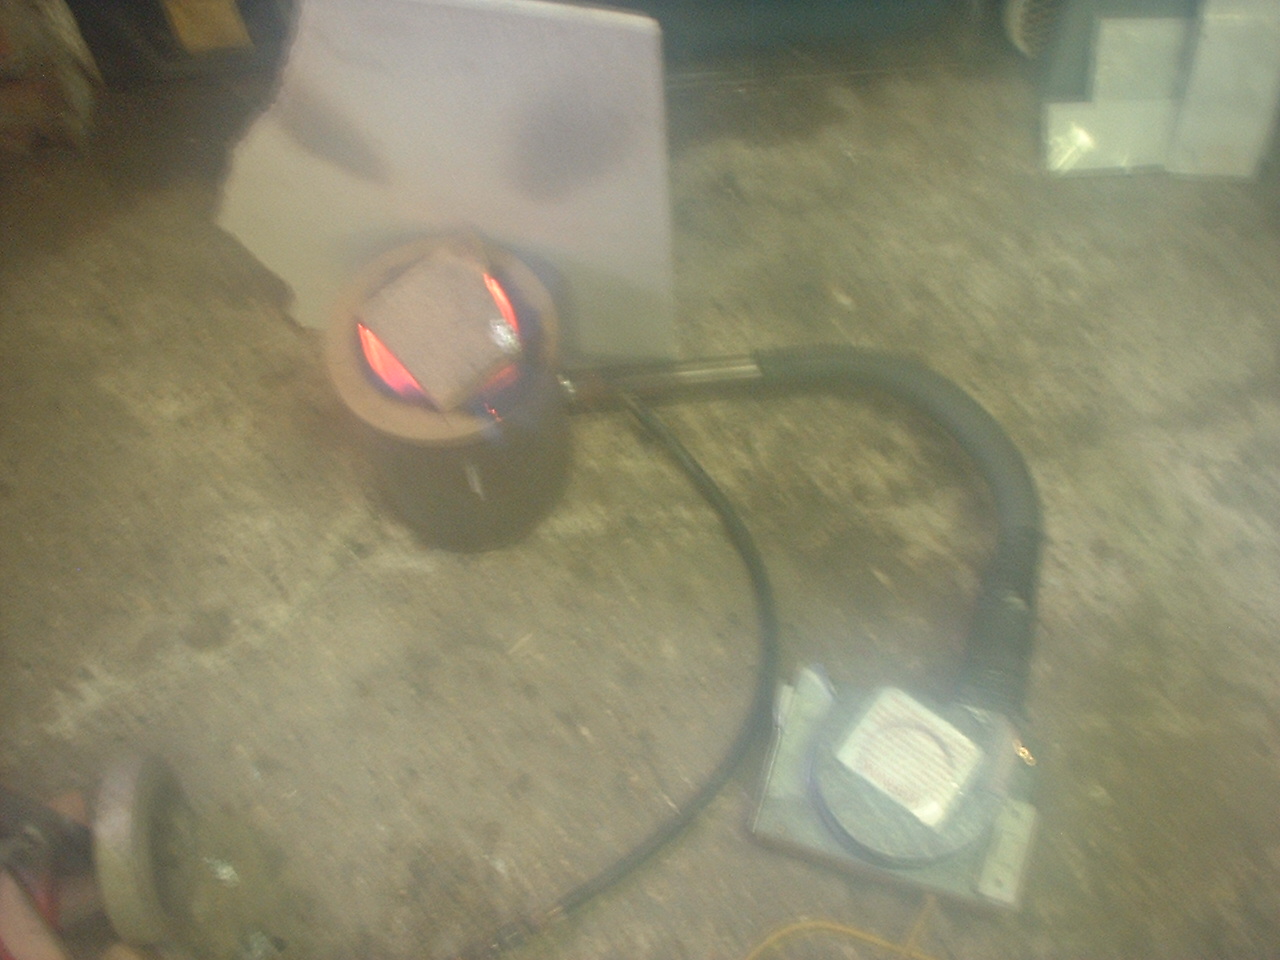
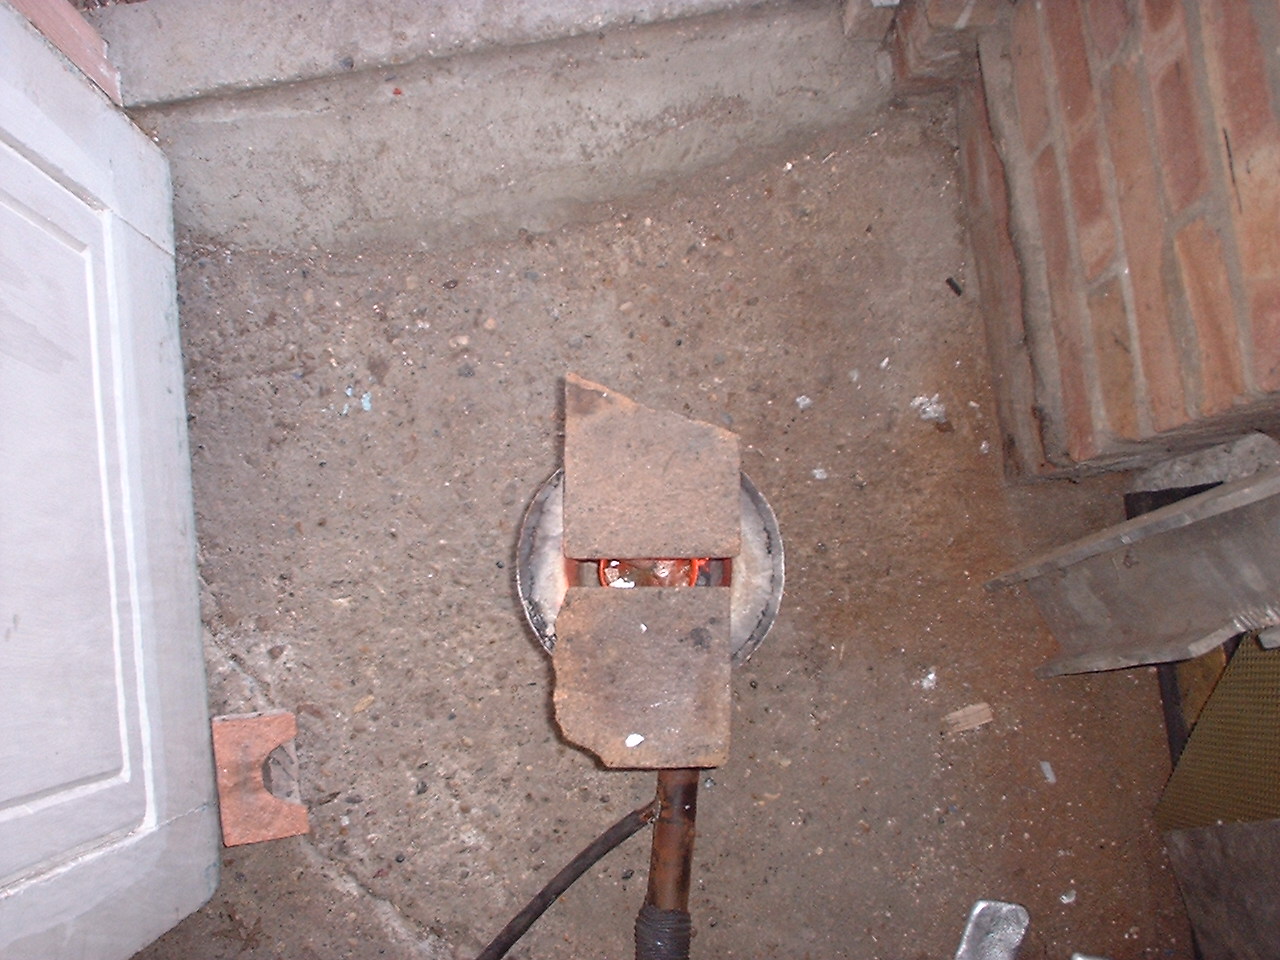
The finished "Baby Furnace" I melted a piece of copper here for a test
(another bad picture)
Once again click for a larger etc.
.
The second picture above shows the high tec. lids I use with these ,whatever piece of brick that comes to hand!
The same principal can be used for a bigger furnace, a better lid would be a good idea though!
.
I'm sorry for the bad quality of some of these pictures, the camera started this "lark" halfway through this build, I took the last few with another camera.